logo website
  • Home
  • Features
  • Templates
  • Pricing
  • Docs
  • Install App
Menu
  • Home
  • Features
  • Templates
  • Pricing
  • Docs
  • Install App

Getting Started

1
  • Introduction

Quick Start

1
  • Create a new form

Display & Placement

5
  • Theme integration
  • Get embed form ID of a form
  • Display a form on Shopify front store
  • Display a form on a specific page
  • Add a form with app block

App Integration

2
  • Google reCAPTCHA Integration
  • hCaptcha integration

Mail Notification

4
  • Admin email notification
  • Customer email notification
  • SMTP Setup
  • Mail API setup

Data, Insights & Management

5
  • Check submissions data
  • View Insight of the Form
  • Export submissions data
  • Export and import forms
  • Disable saving submission data for forms
View Categories

Export submissions data

3 min read

How to Export Submission Data in Viformy #

Export Submission Data allows you to download form submissions from Viformy for reporting, backup, offline review, or further analysis in spreadsheet tools.

In Viformy, submission data can be exported from the Submissions page. You can export submissions for a selected form as either CSV or Excel.

Before You Start #

Before exporting submission data, make sure the form has saved submissions.

  • Save submission data is enabled: Open the form Settings tab and make sure Save submission data is turned on.
  • The form has at least one saved submission: If the selected form has no submissions, Viformy will show a message that there are no submissions for that form.
  • You know which form to export: The export modal requires selecting a form before export can start.
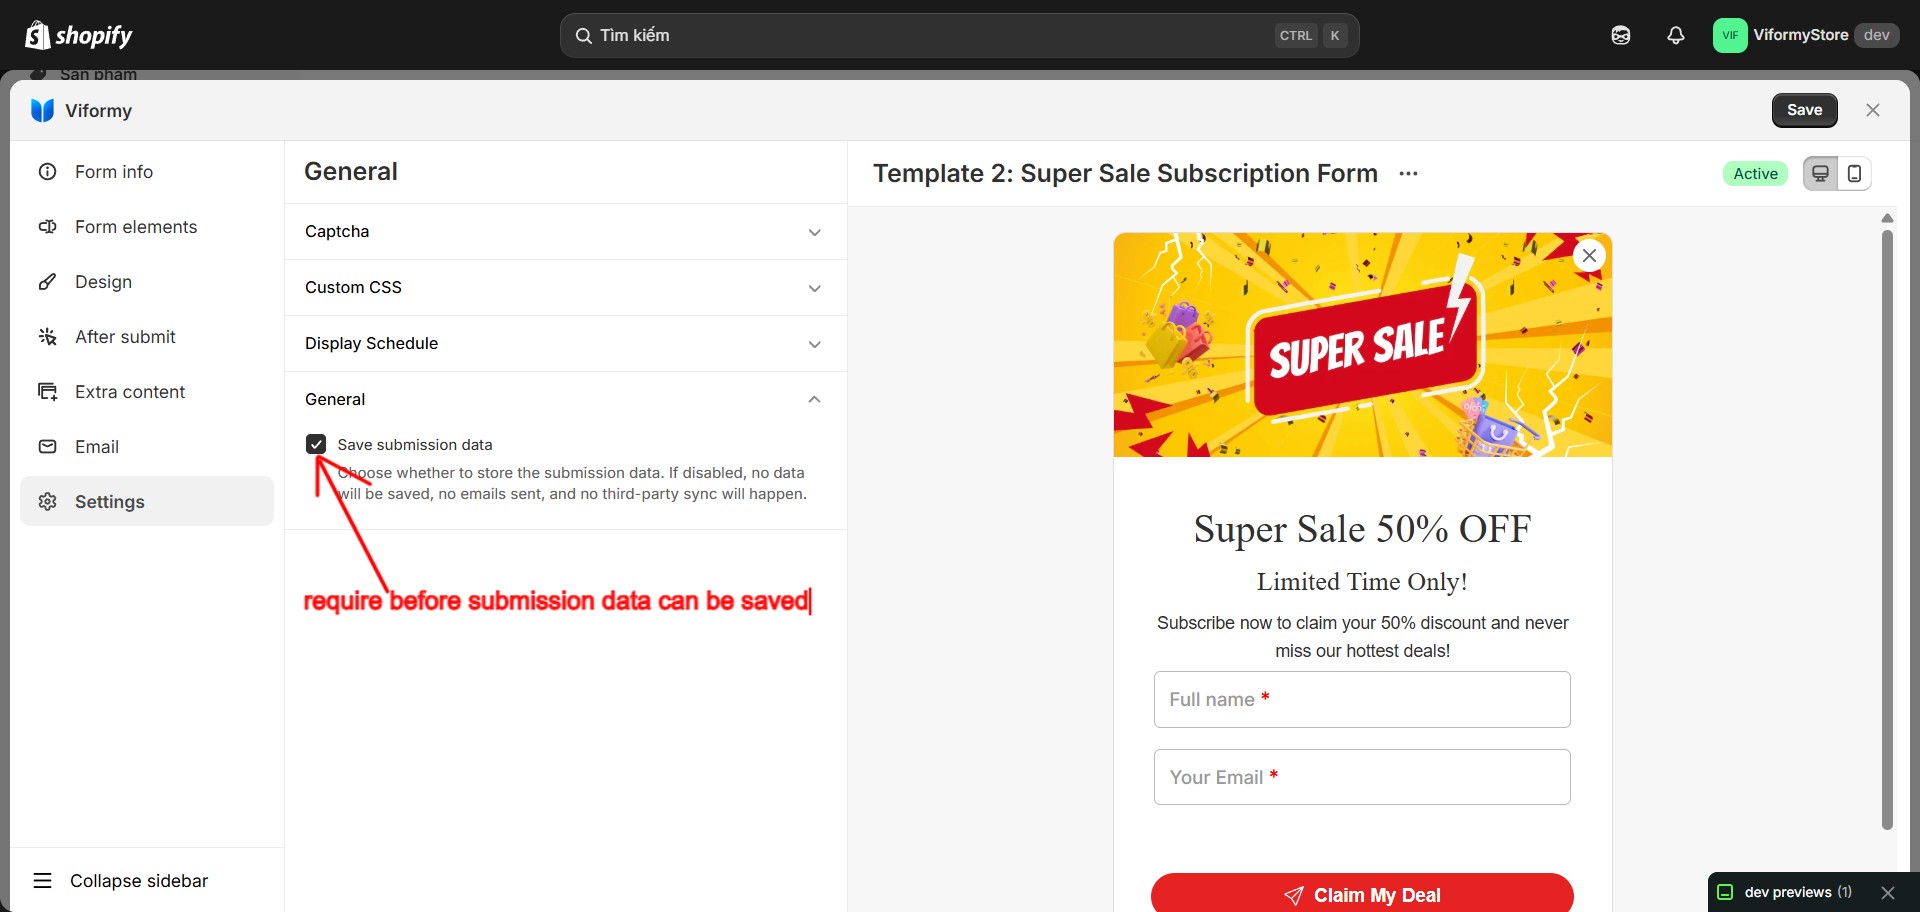
Important: If Save submission data is disabled, Viformy does not save submissions. Those submissions cannot be exported later.

check sum 1

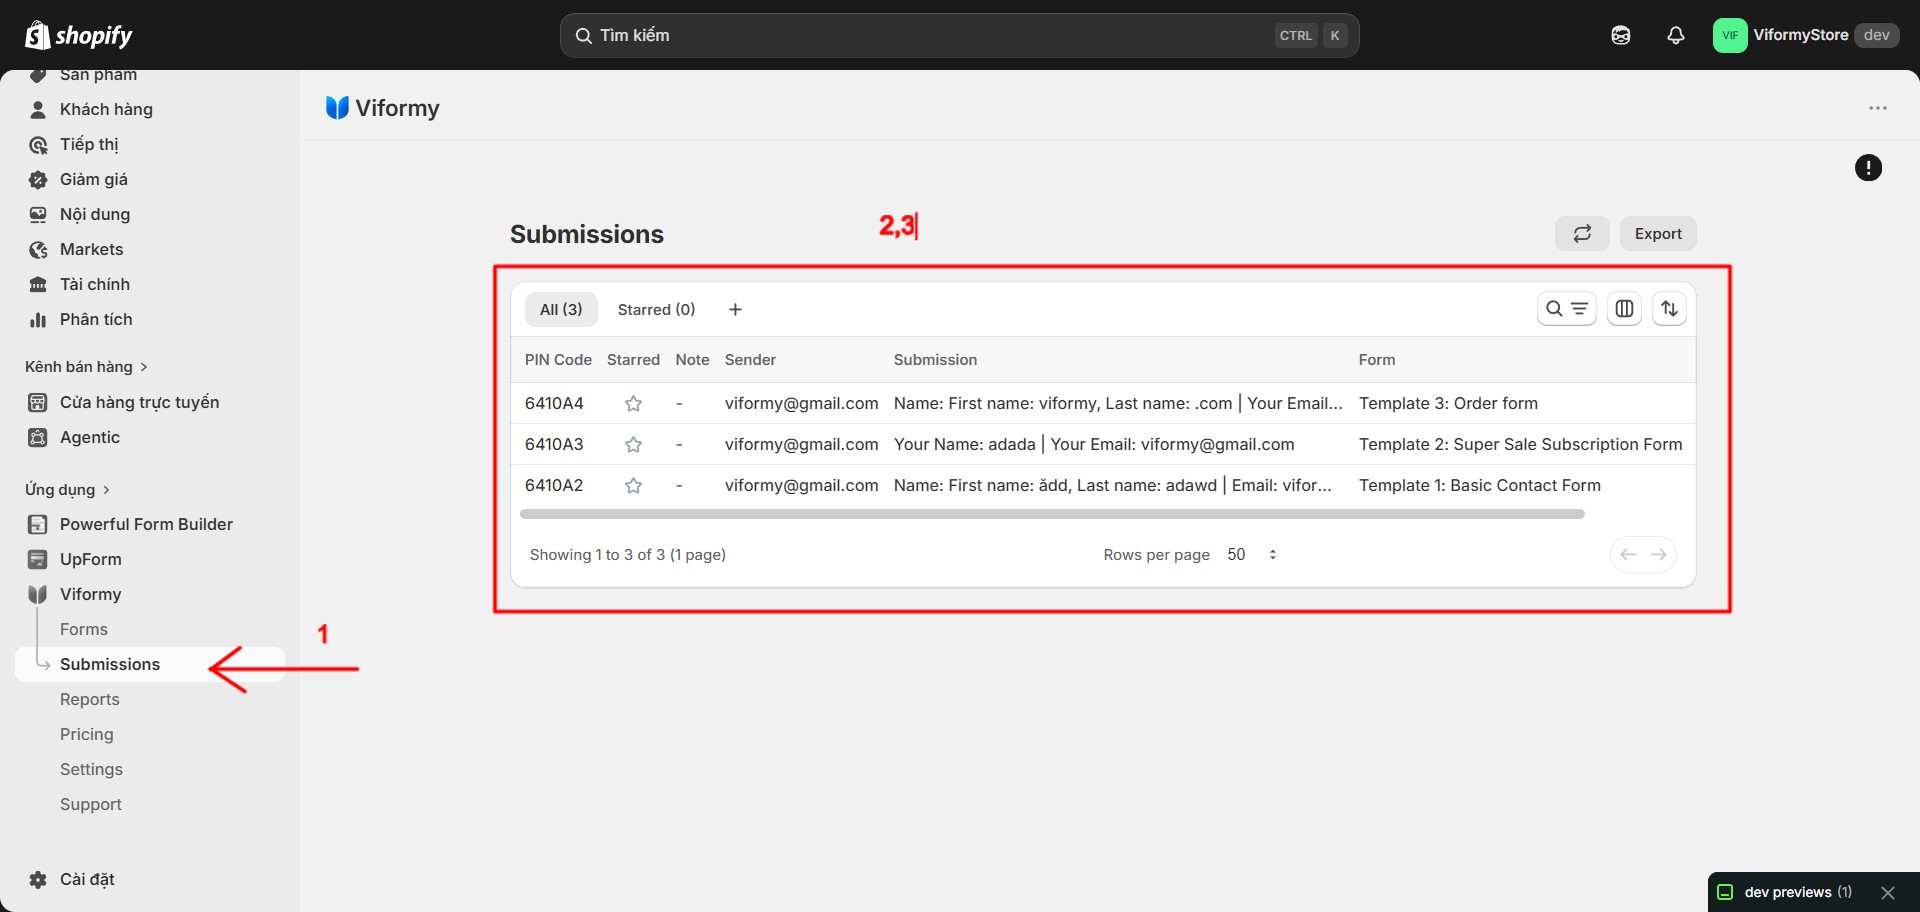
Step 1: Open the Submissions Page #

Go to the Viformy app in Shopify Admin and open the Submissions page.

This page shows saved submission data from your forms, including sender, form name, submission preview, date, note, starred status, and PIN code.

check sum 2

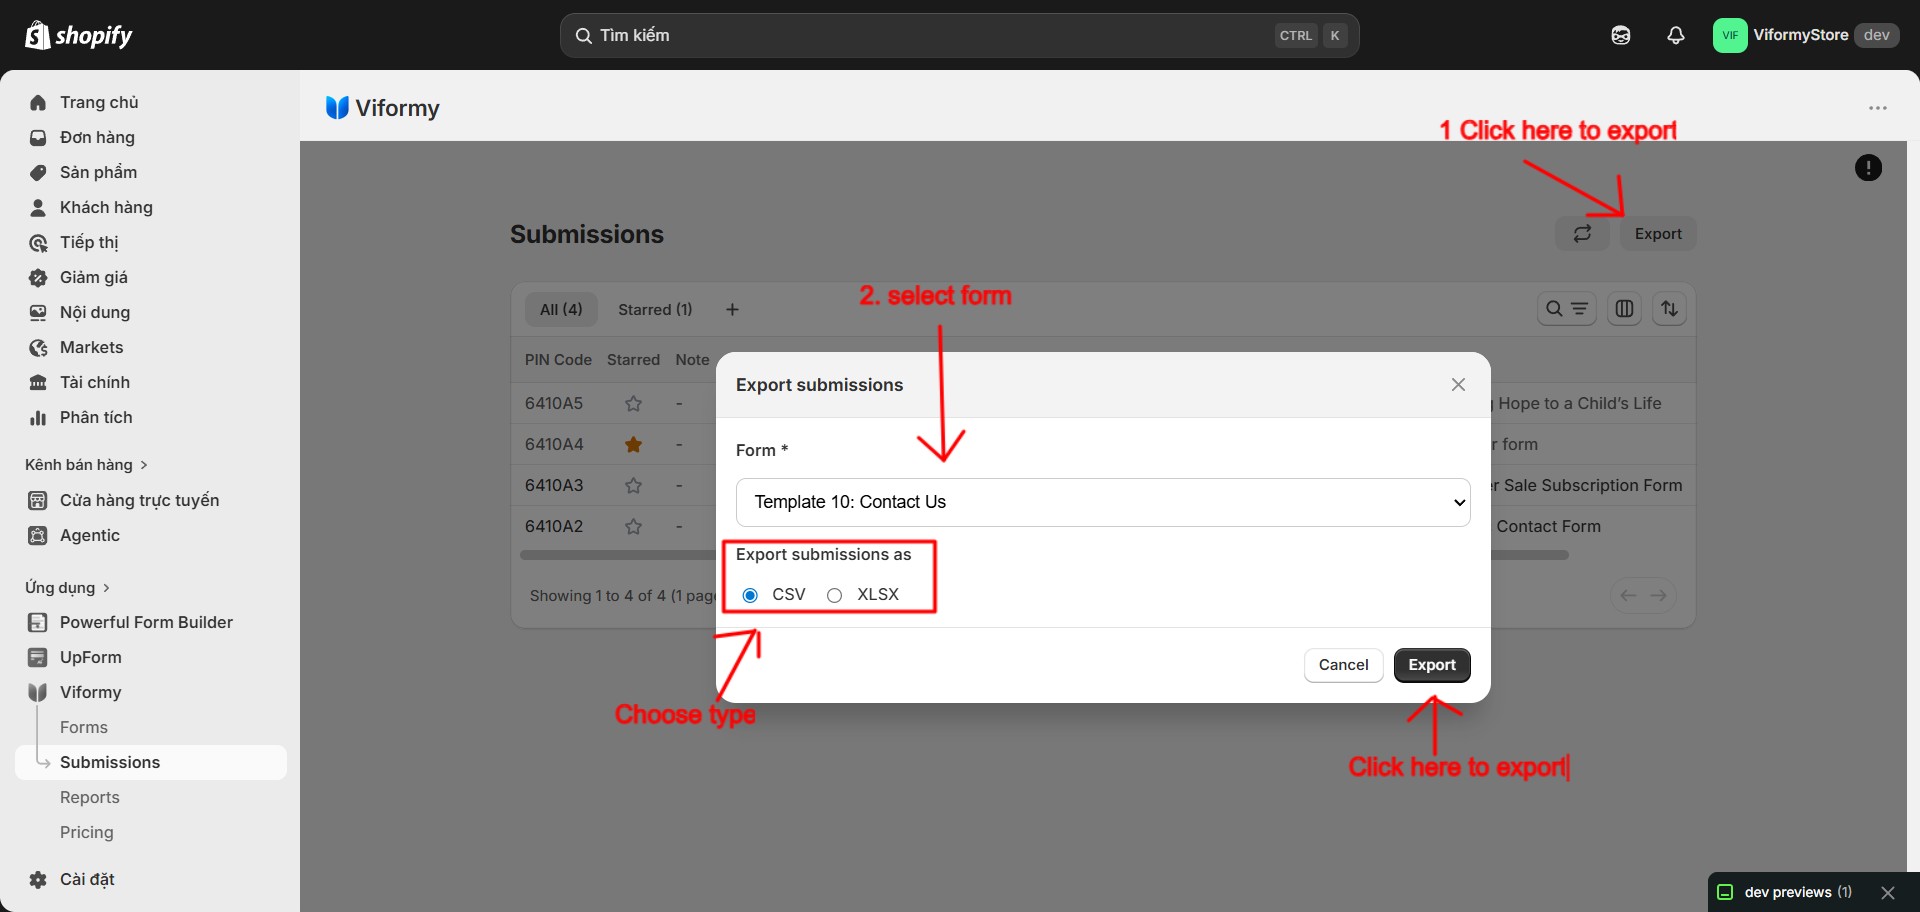
Step 2: Click Export #

On the Submissions page, click Export.

The Export submissions modal will open.

check sum 11

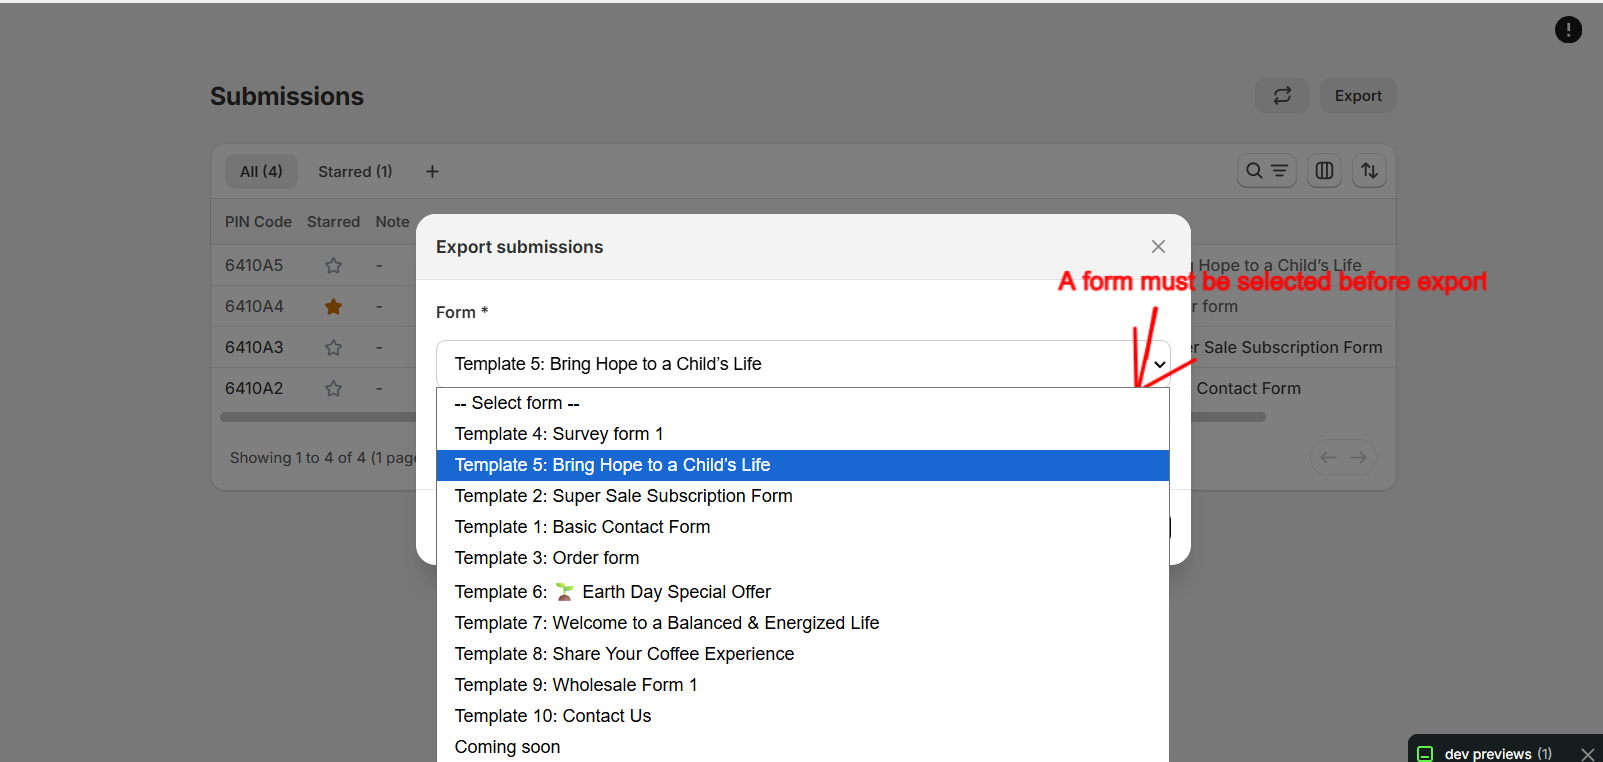
Step 3: Select the Form #

In the Export submissions modal, select the form you want to export.

The form field is required. If no form is selected, Viformy will show a warning asking you to select a form.

Please select a form

If the selected form has no submissions, Viformy will show:

No submissions for selected form
 export 1

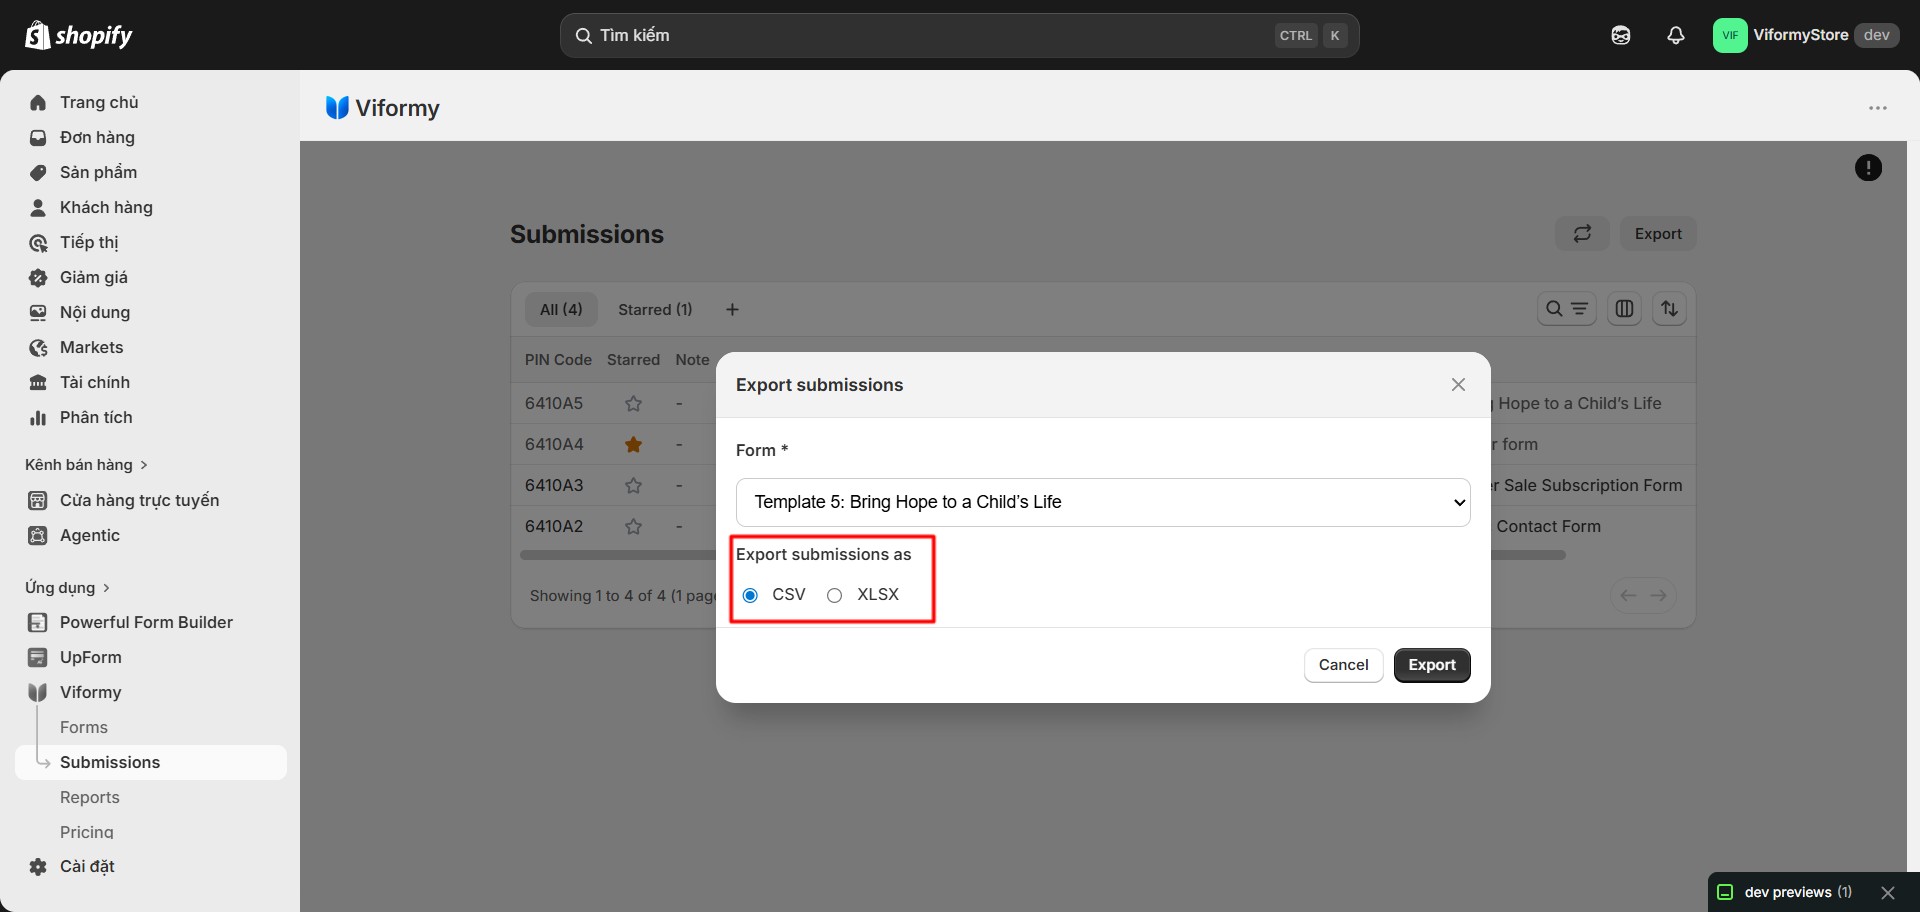
Step 4: Choose Export Format #

Choose how you want to export the submission data.

  • CSV: Best for spreadsheets, imports, backups, or data processing tools.
  • Excel: Downloads an Excel-compatible file that can be opened in spreadsheet software.
screenshot 1

Step 5: Start Export #

After selecting a form and export format, click Export in the modal.

Viformy will generate the file and start the download. You may see a confirmation message such as:

Export started

What Data Is Included in the Export #

The exported file includes the following columns:

  • PIN Code: Short identifier for the submission.
  • Starred: Shows whether the submission was starred.
  • Sender: Customer email, name, or detected sender value.
  • Form: Form name.
  • Submission: Submitted field values shown as a one-line summary.
  • Date: Submission date and time.
  • Note: Internal note added to the submission.
  • Status: Submission status, such as new or read.

Export File Names #

Viformy generates file names based on the selected form name and export date.

CSV files use a name similar to:

submissions-contact-us-2026-05-27.csv

Excel files use a name similar to:

list-submission-form-contact-us-2026-05-27.xls

Common Cases #

Please select a form

This appears when you click Export without choosing a form. Select a form in the export modal and try again.

No submissions for selected form

This means the selected form does not have saved submissions. Check that the form has received submissions and that Save submission data is enabled.

Exported file has fewer rows than expected

The export is based on submissions that match the selected form. Make sure you selected the correct form.

Submission values are shown as a summary

The export uses a one-line summary of submitted field values in the Submission column. To inspect the full detail of a single submission, open it from the Submissions page.

Quick Workflow #

  • Enable Save submission data in the form Settings tab.
  • Open Submissions.
  • Click Export.
  • Select the form to export.
  • Choose CSV or Excel.
  • Click Export to download the file.
Updated on May 27, 2026

What are your Feelings

  • Happy
  • Normal
  • Sad

Share This Article :

  • Facebook
  • X
  • LinkedIn
  • Pinterest
View Insight of the FormExport and import forms
ON THIS PAGE
  • How to Export Submission Data in Viformy
  • Before You Start
  • Step 1: Open the Submissions Page
  • Step 2: Click Export
  • Step 3: Select the Form
  • Step 4: Choose Export Format
  • Step 5: Start Export
  • What Data Is Included in the Export
  • Export File Names
  • Common Cases
  • Quick Workflow

The most powerful and flexible form building solution for Shopify merchants.

Product

  • Features
  • Integrations
  • Pricing

Support

  • Documentation
  • Help Center
  • API Reference

Legal

  • Privacy Policy
  • Terms of Service