
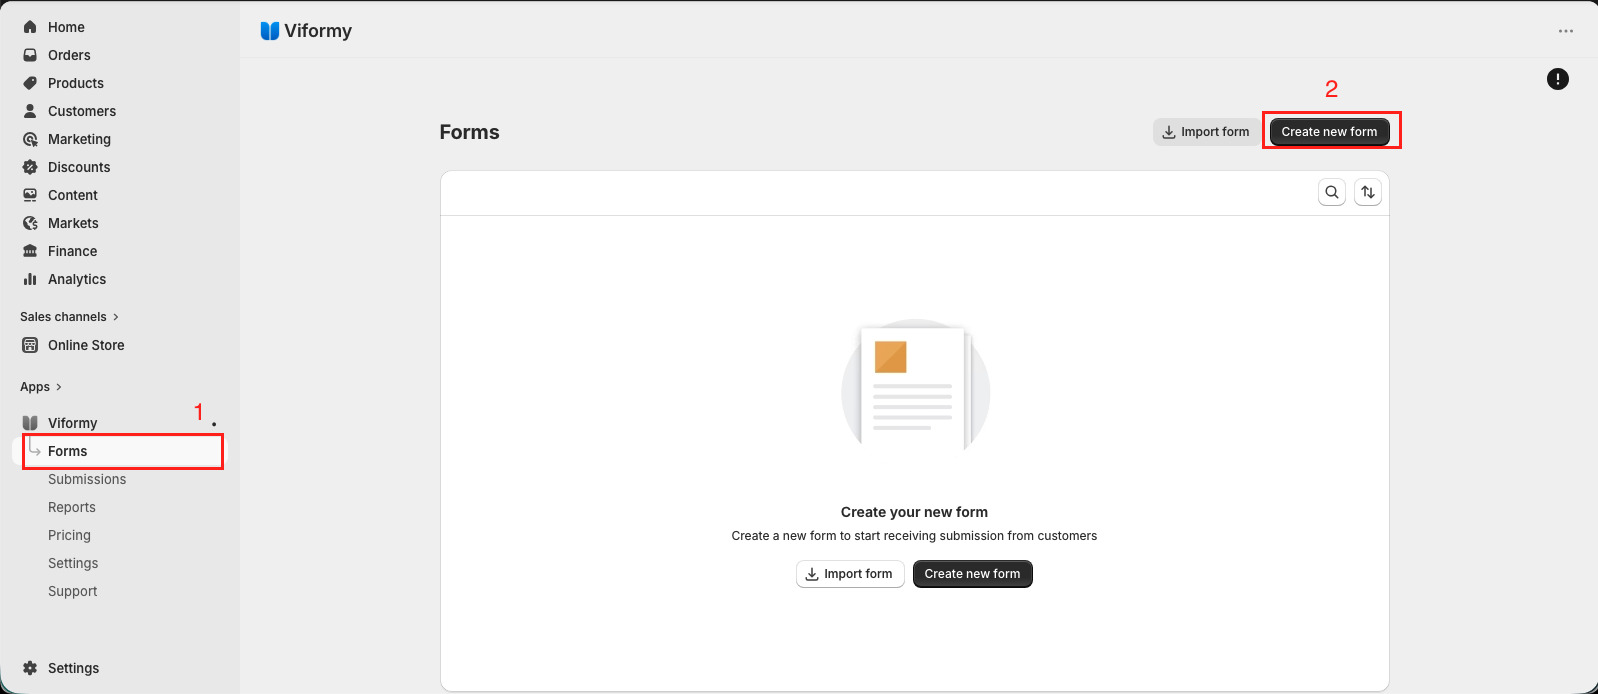
Step 1: Create a New Form #
-
-
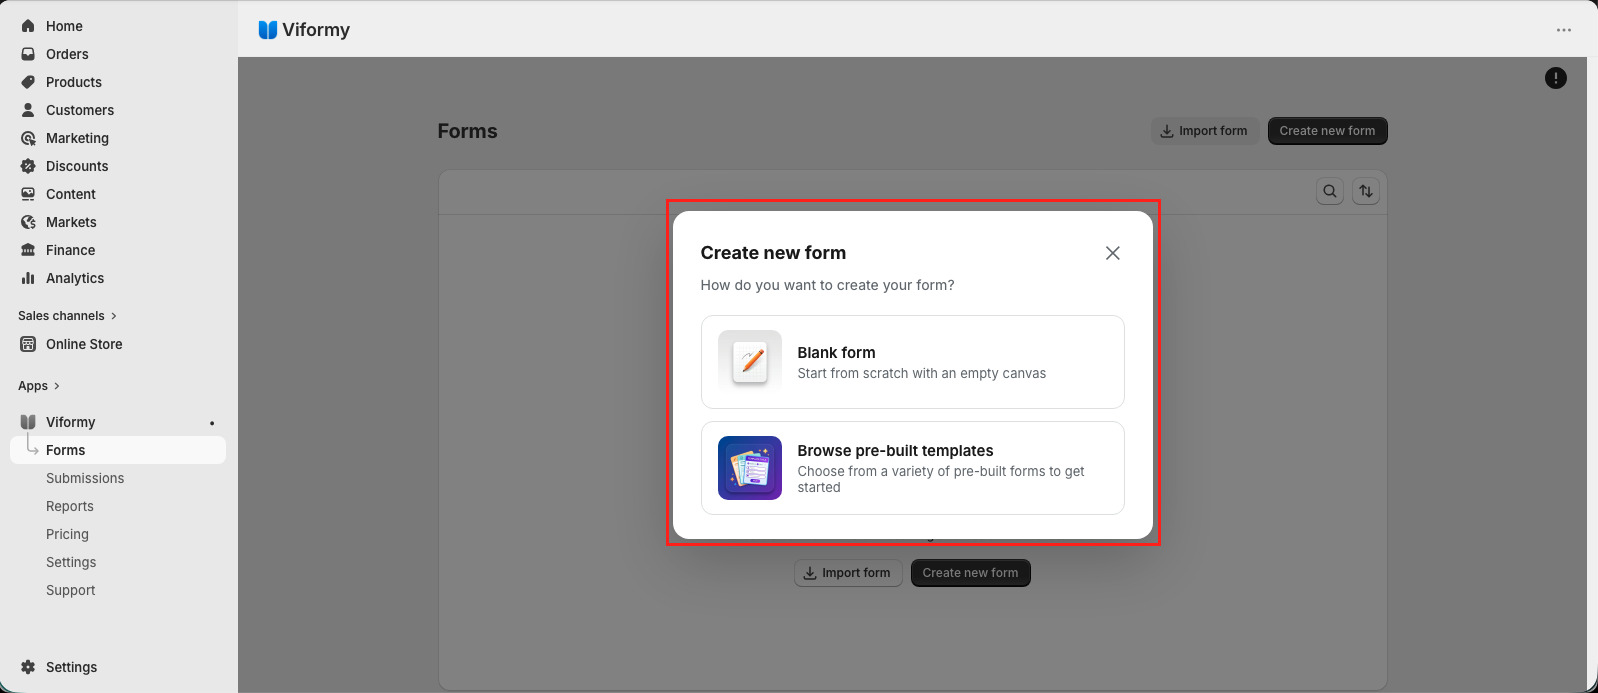
Choose one option:
-
Blank Form – start from zero.
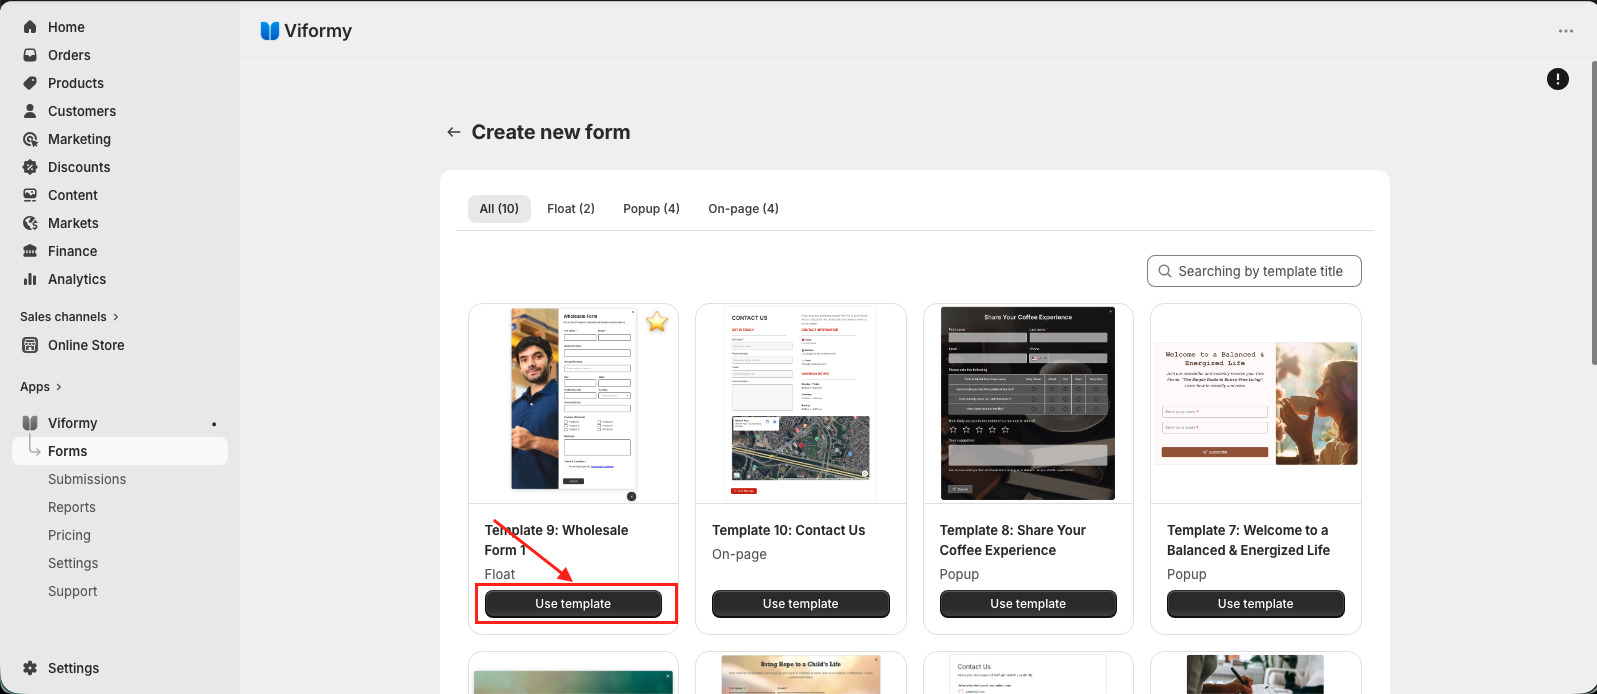
- Template – choose a ready-made form and edit it.
Step 2: Build Your Form #
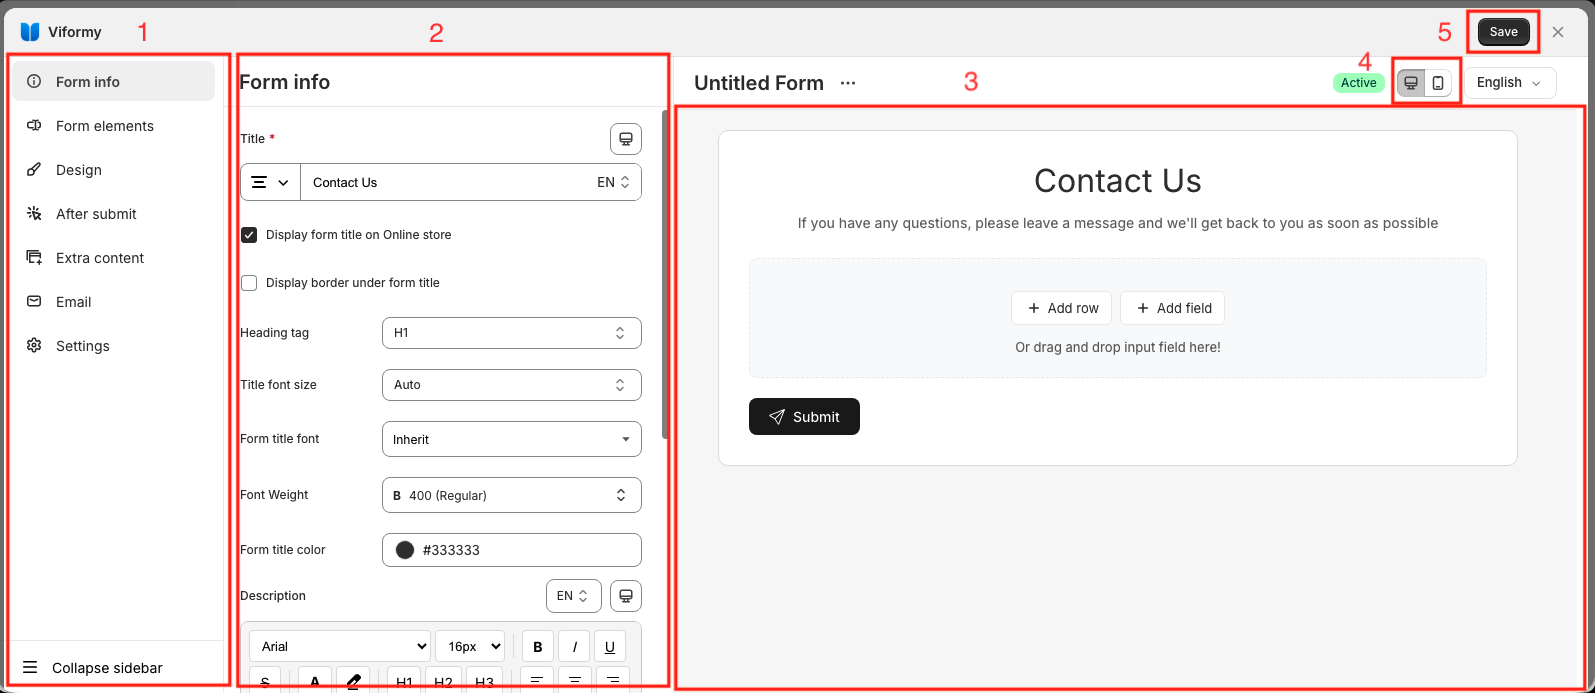
After choosing a form, you will enter the form editing screen
- Navigation Sidebar – Main menu for managing form sections.
- Settings Panel – Configure selected form settings and styles.
- Form Builder / Preview – Drag-and-drop area with live form preview.
- Responsive Toggle – Switch between desktop and mobile preview.
- Action Bar – Save, close, and choose where the form will appear in your store.
Step 3: Add Fields to Your Form #
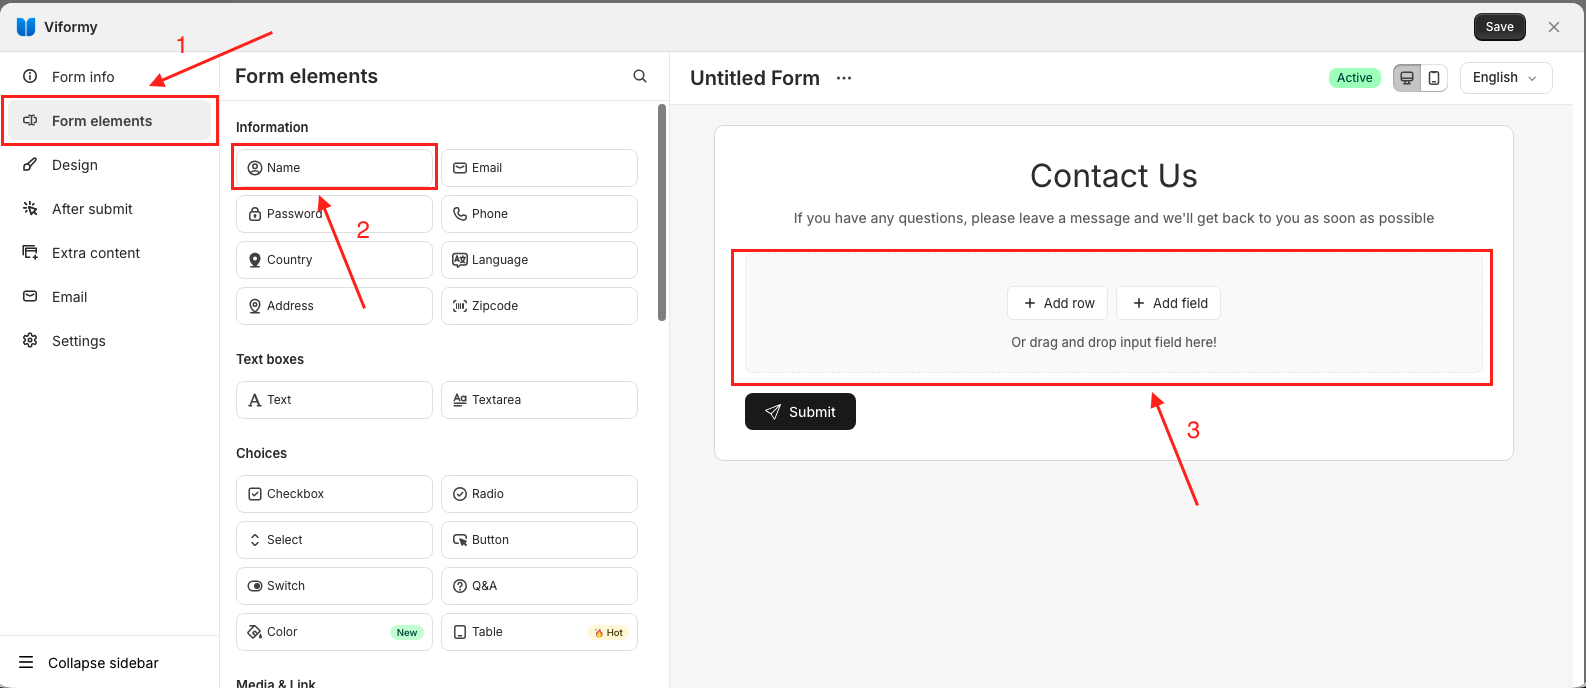
There are two ways to do this:
Option 1:
- Select Form elements
- Select a field such as Name, etc.
- Drag and drop it into the live form preview area
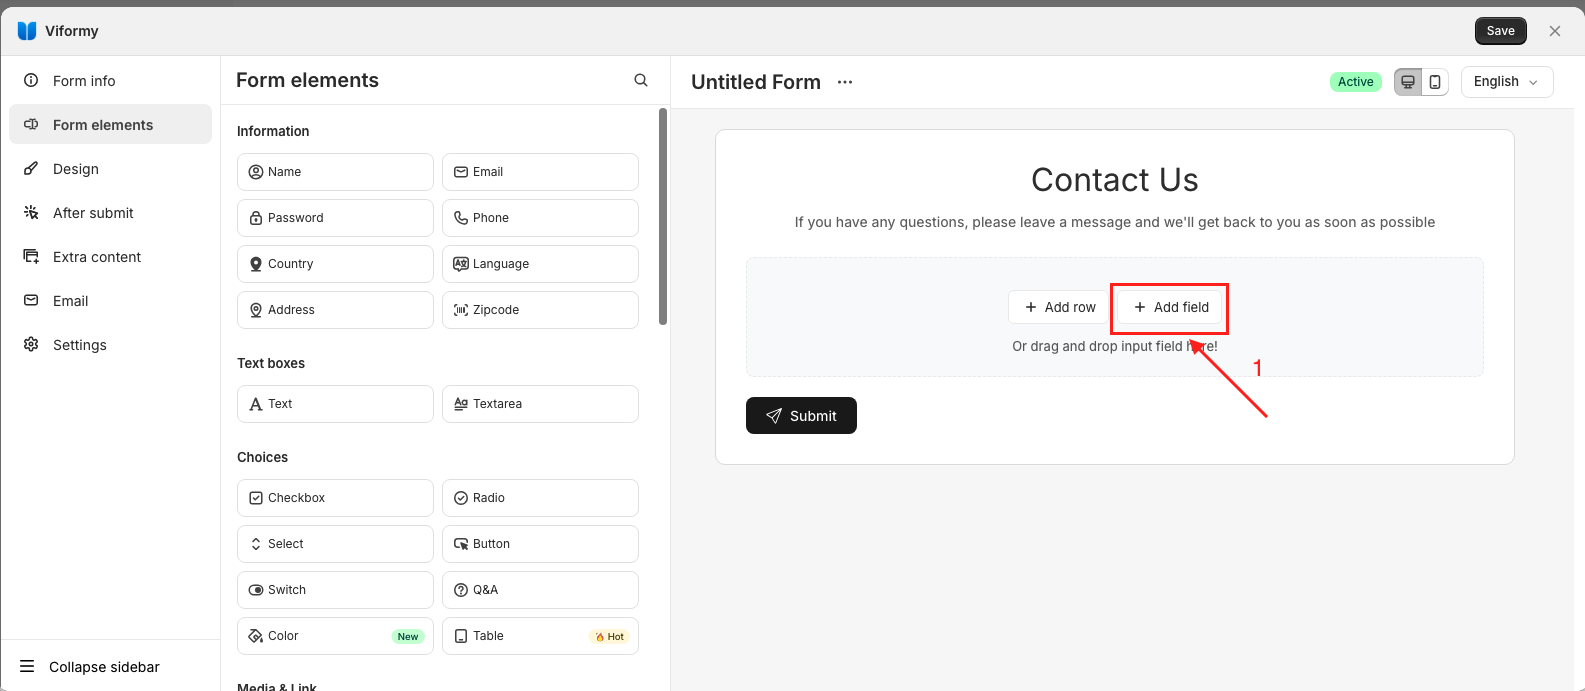
Option 2:
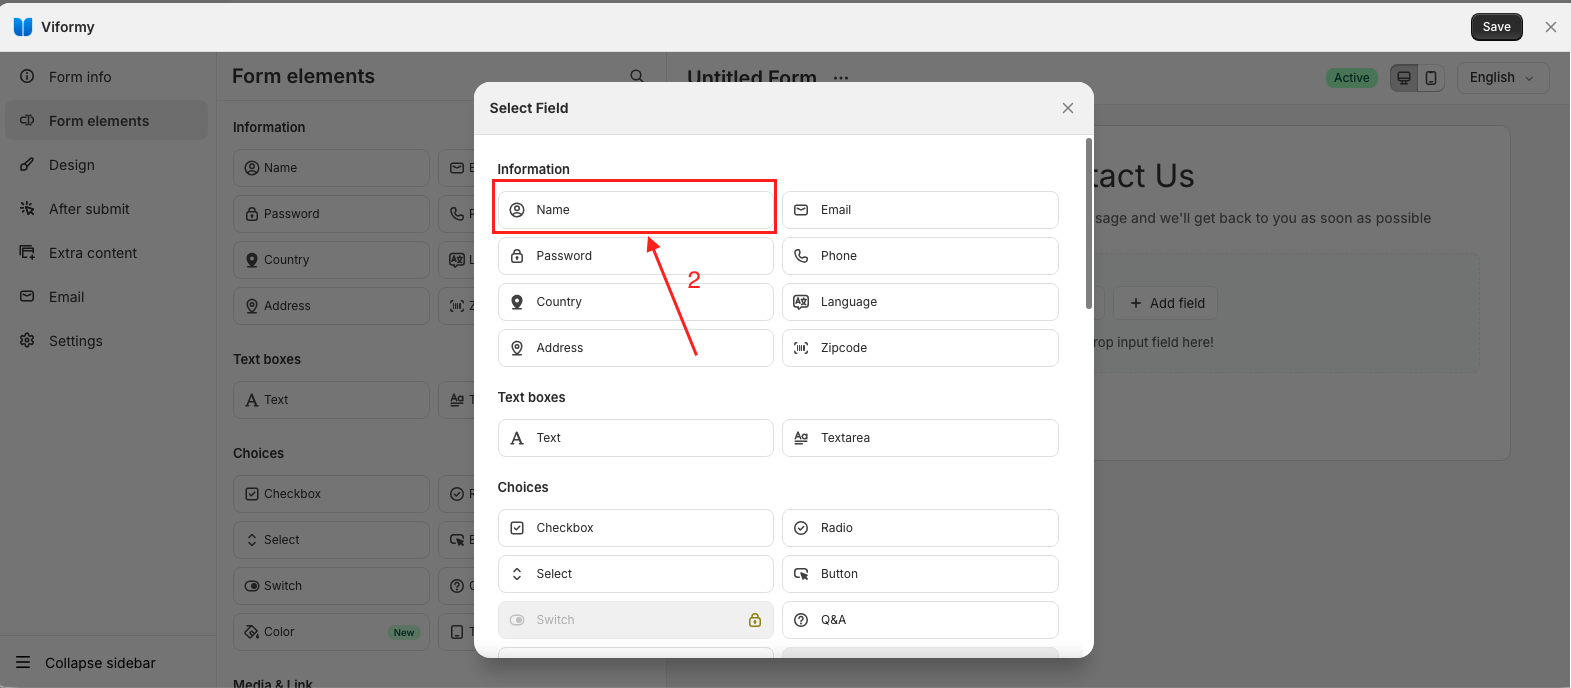
- Click the Add Field button
- Select a field such as Name, etc.
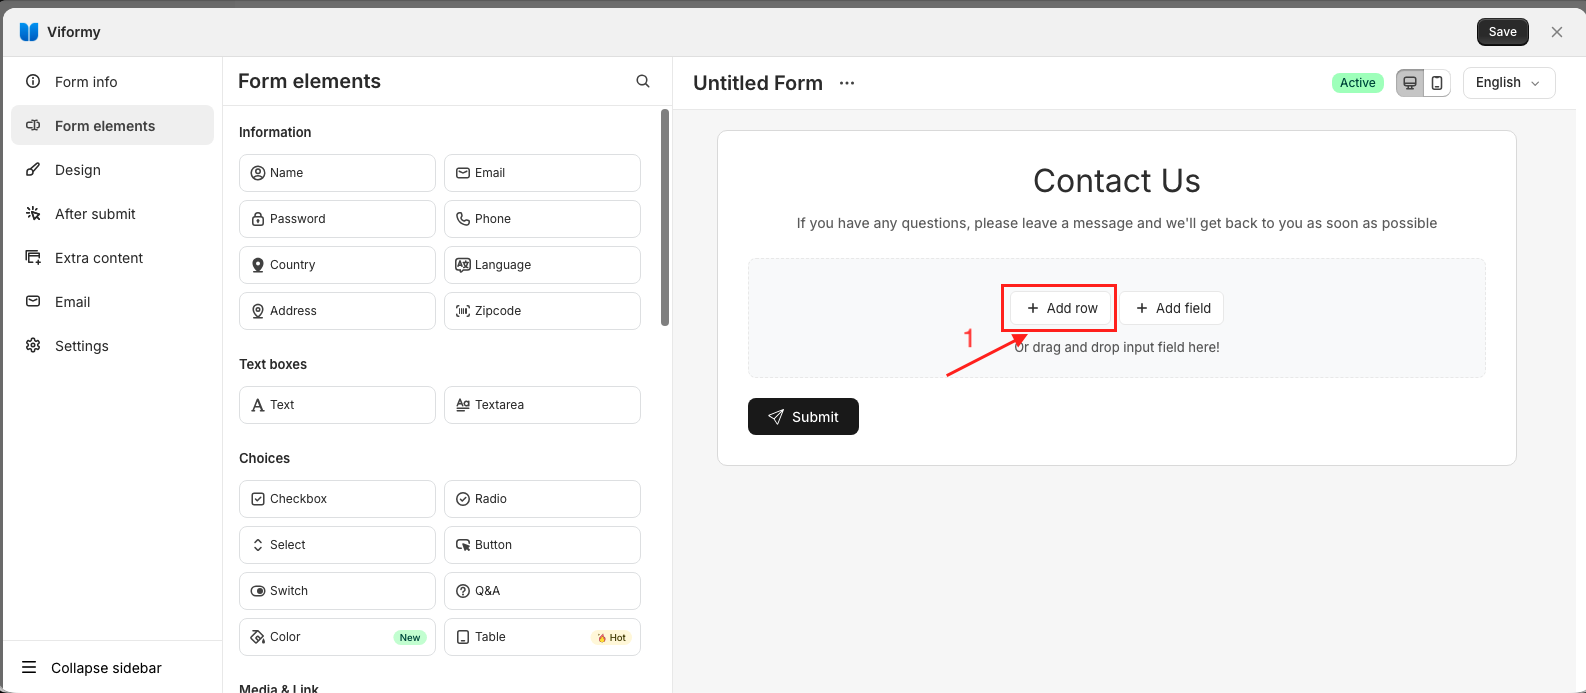
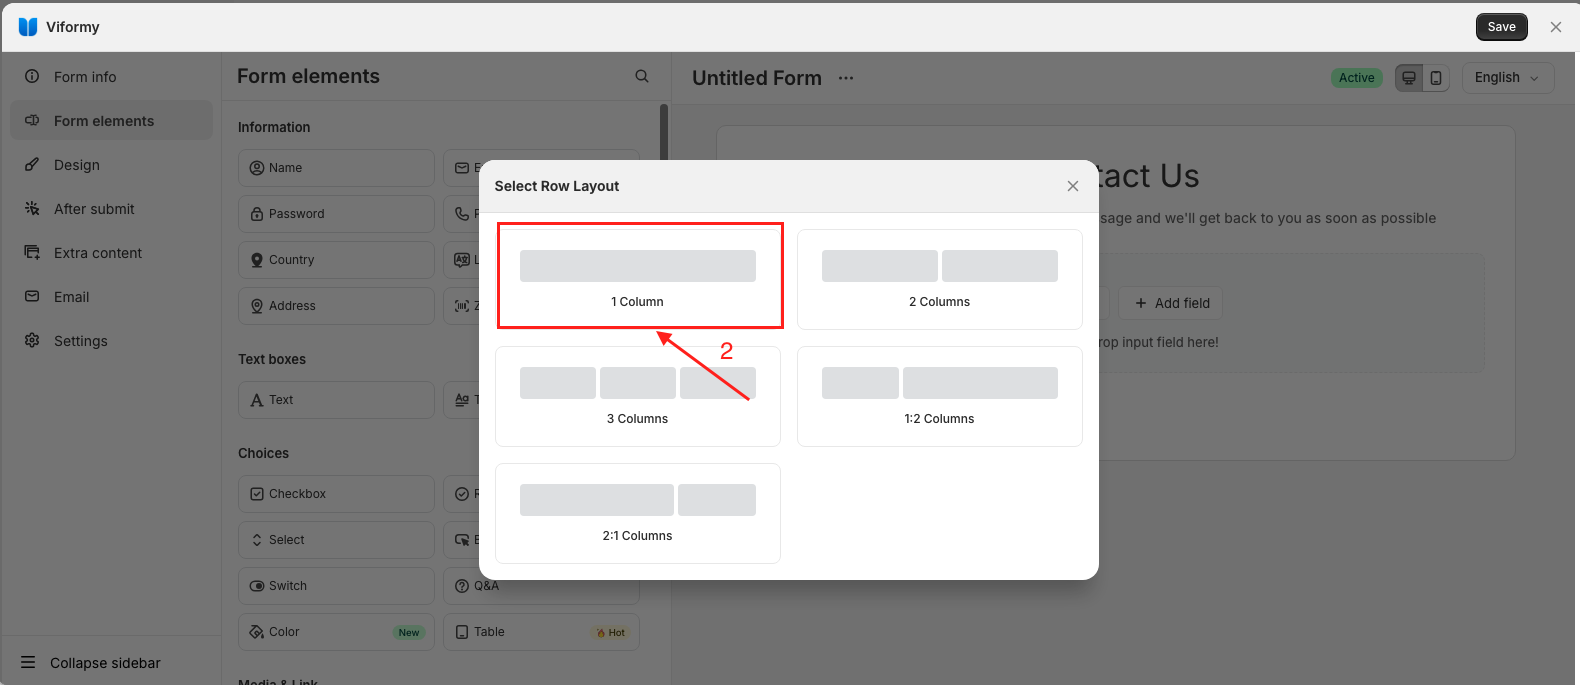
You can edit the row structure by clicking the Add Row button:
Step 4: Edit a Field #
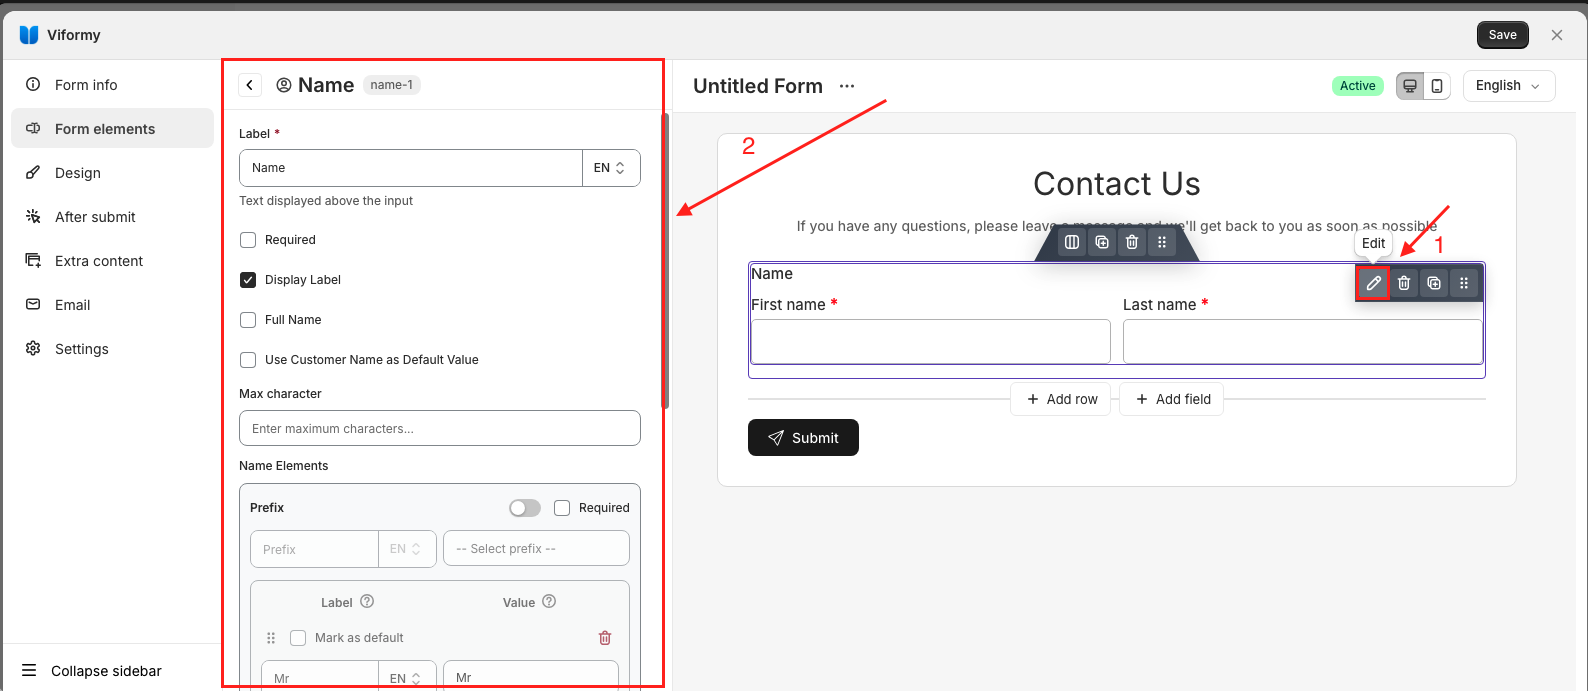
- Click Edit on any field
- Common field settings:
- Label: the field name (e.g., “Full Name”)
- Hide Label: hide the label text
- Keep Label Space: keep spacing while hiding the label
- Required: make the field mandatory
Step 5: Use the Field Toolbar #
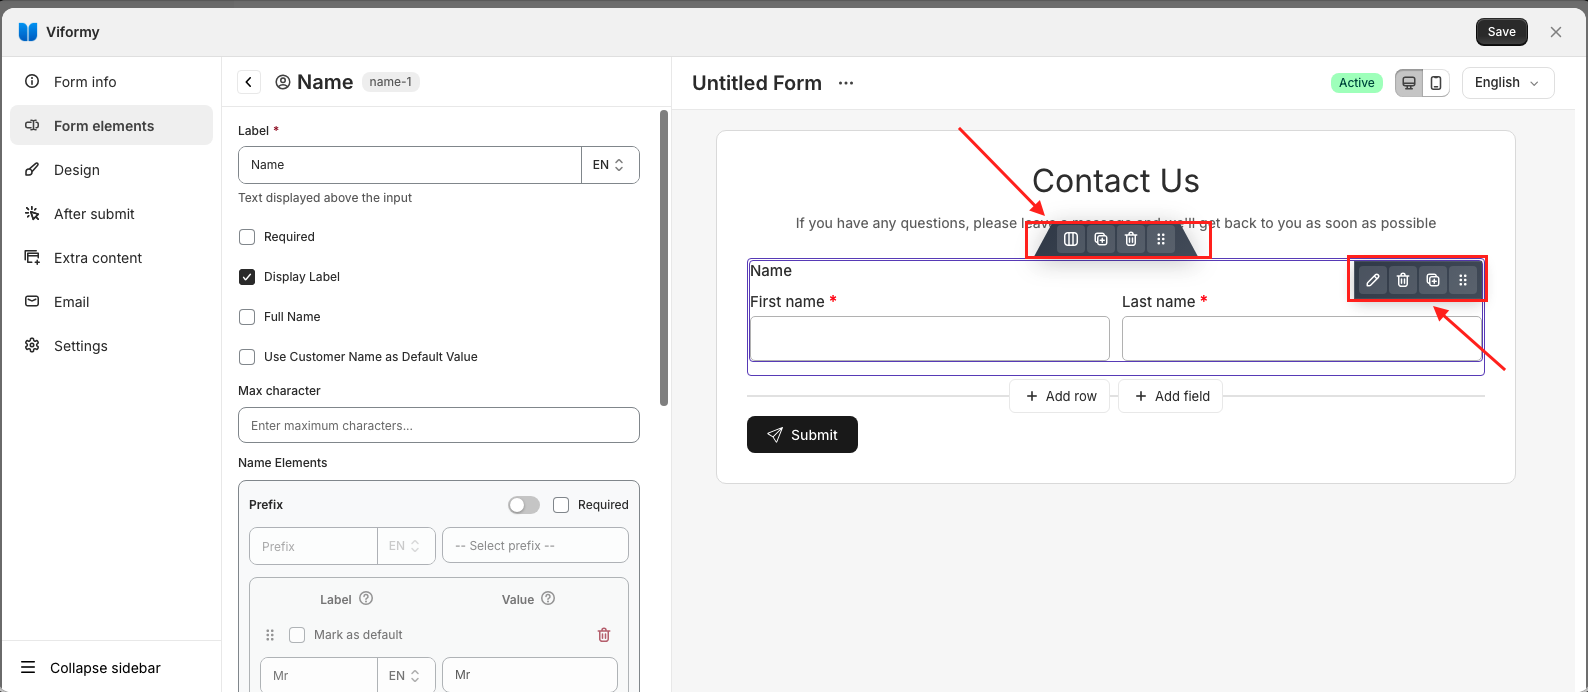
Toolbar actions:
- Change layout: change the row structure
- Duplicate row: copy the row
- Delete row: delete the row
- Drag to move: drag the row or field to a new position
- Edit: edit the field
- Delete: delete the field
- Duplicate: copy the field
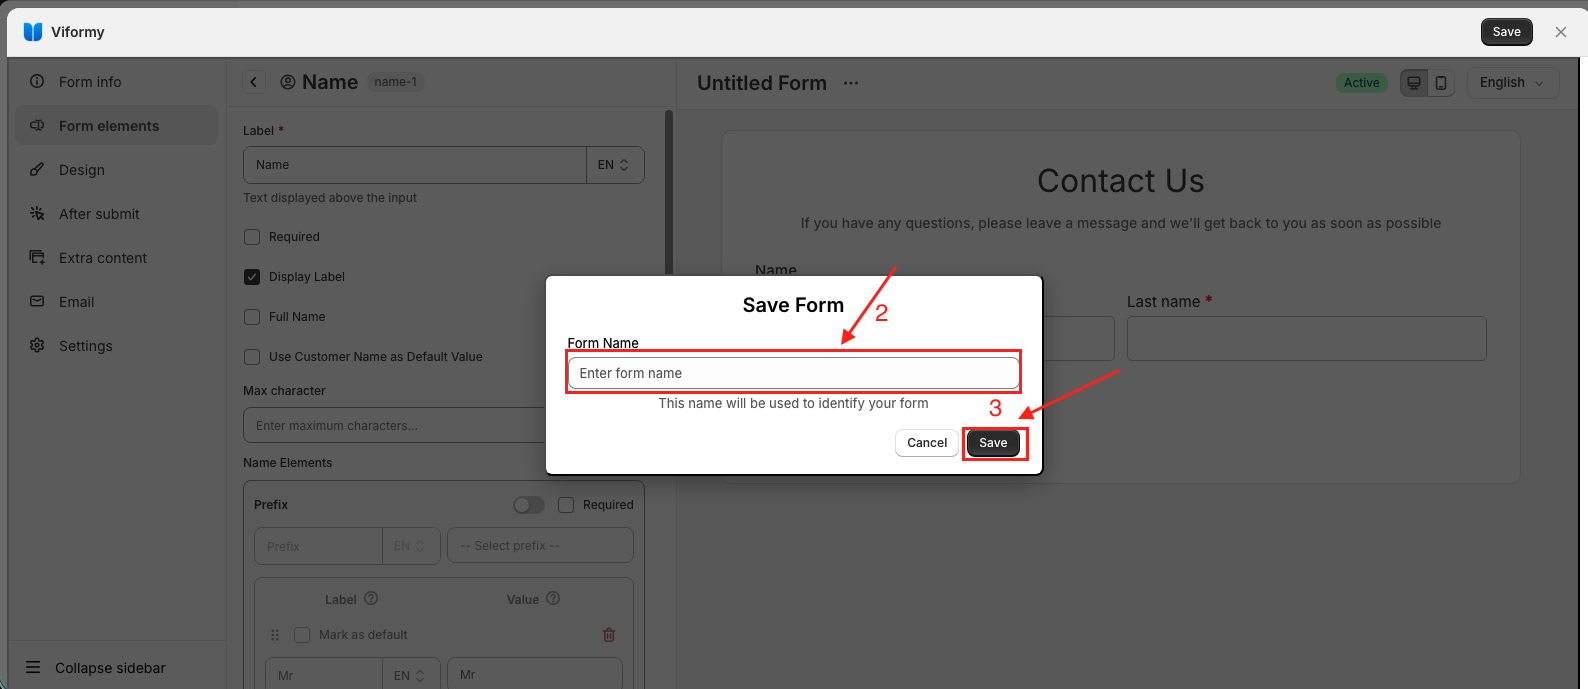
Step 6: Save Your Form #
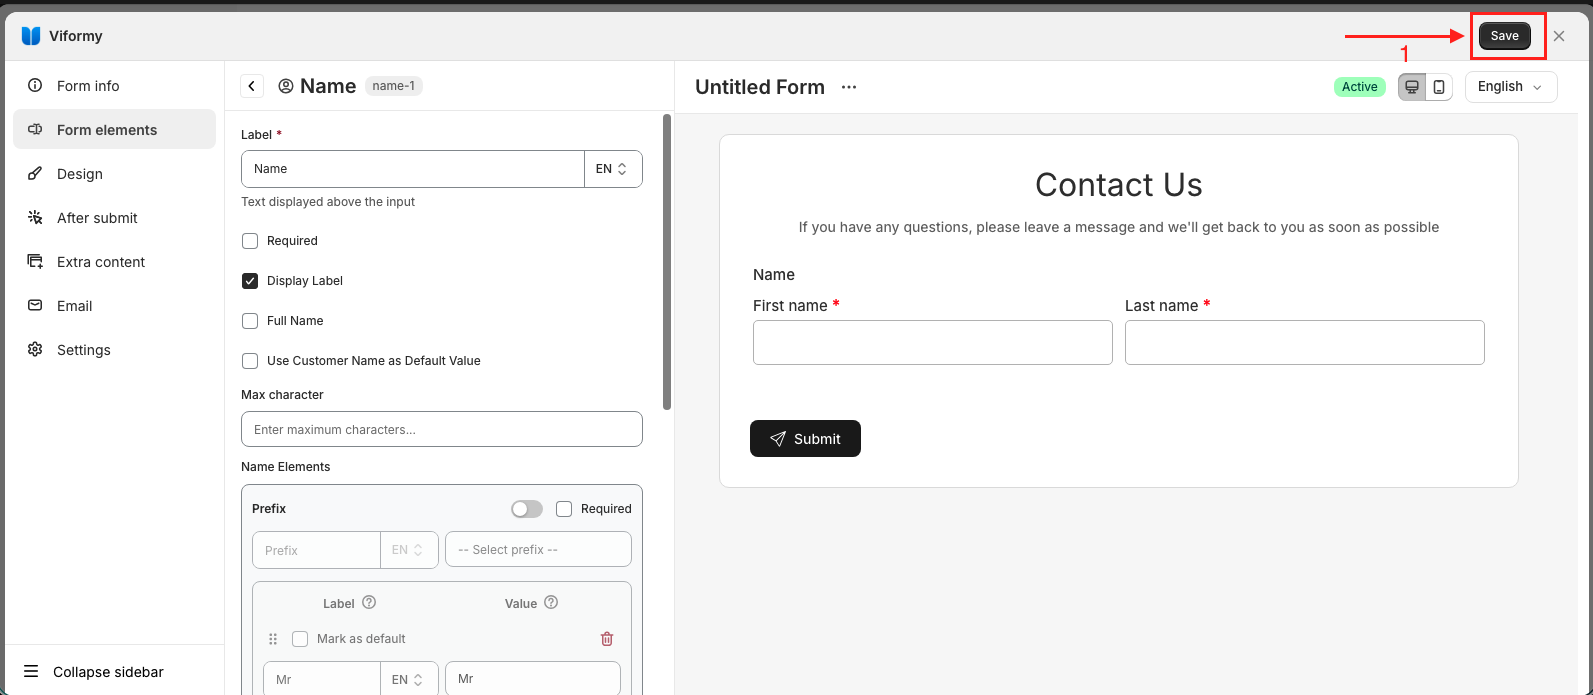
- Click the Save button in the upper-right corner.
- Enter a name for the form.
- Click the Save button to save the form to the list.
Step 7: Display Your Form on Your Store #
-
A page section (using Shopify’s theme editor)
-
A specific page
-
The homepage
-
A product page
-
Or via embed form ID
-
Click Save once your form is ready
-
To display the form on your store, embed it on any page using the provided form ID or section block
Tutorial video #
Comming soon…