
How to Check Submission Data in Viformy #
Before You Start #
-
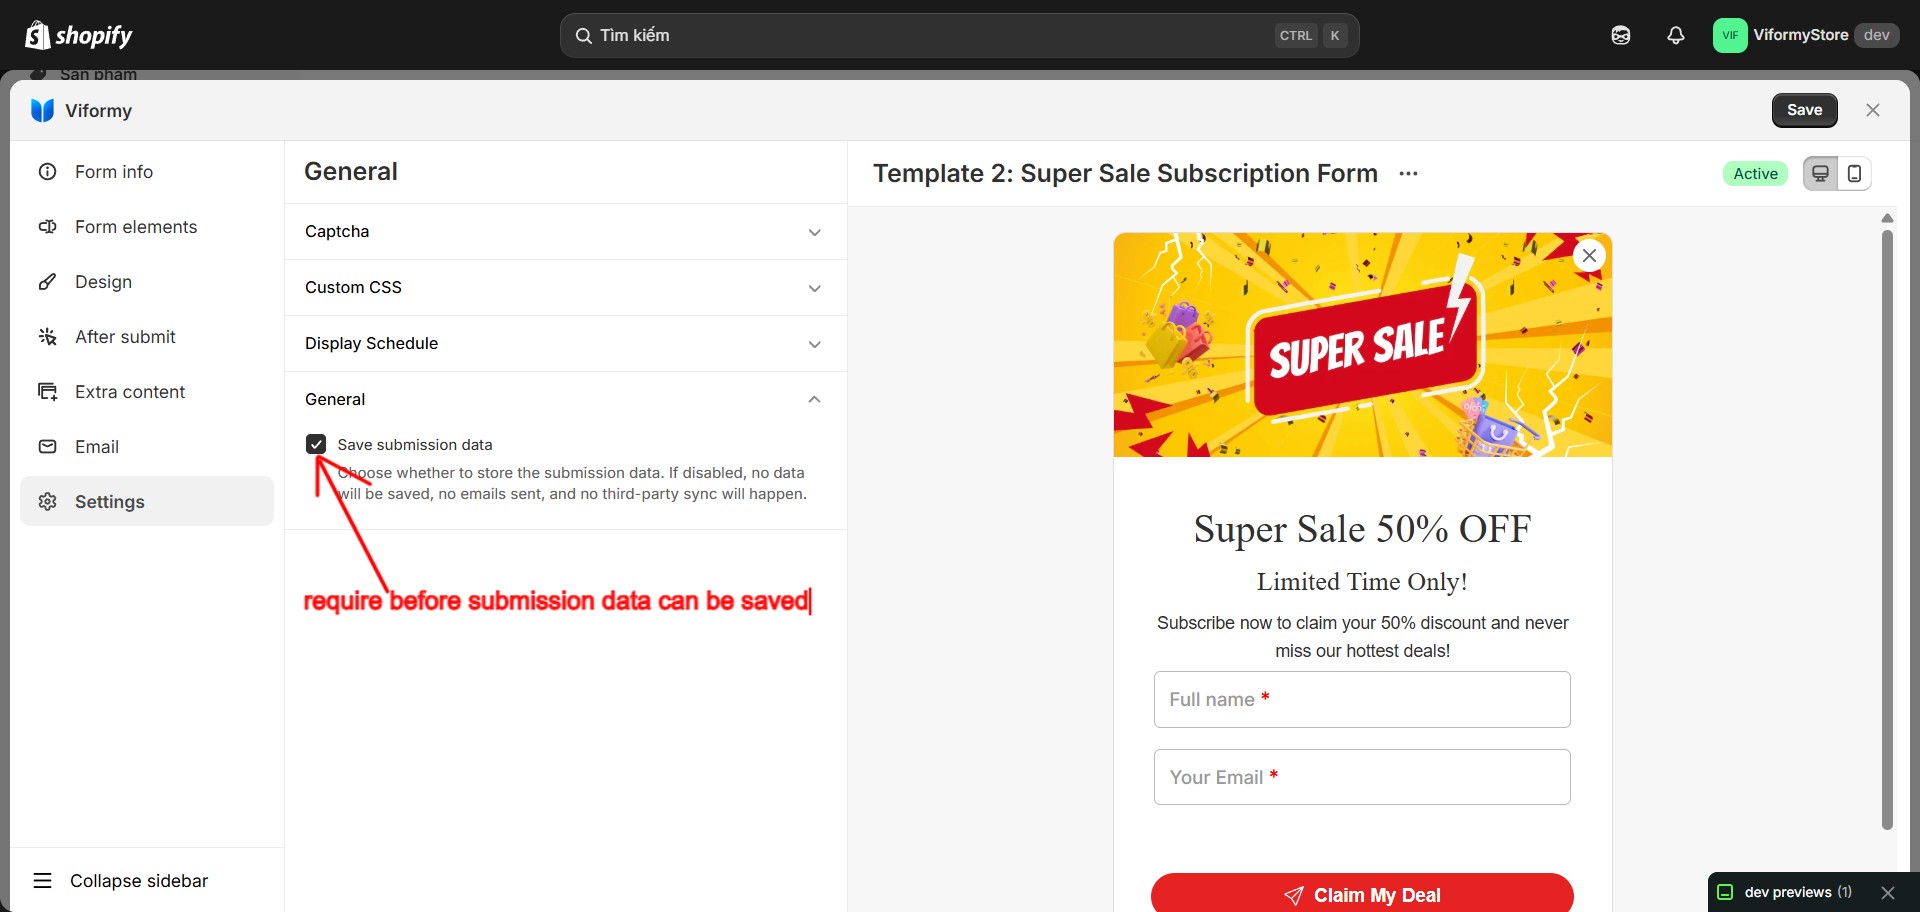
Open the form in Form Builder.
-
Go to the Settings tab.
-
Turn on Save submission data.
Step 1: Open the Submissions Page #
-
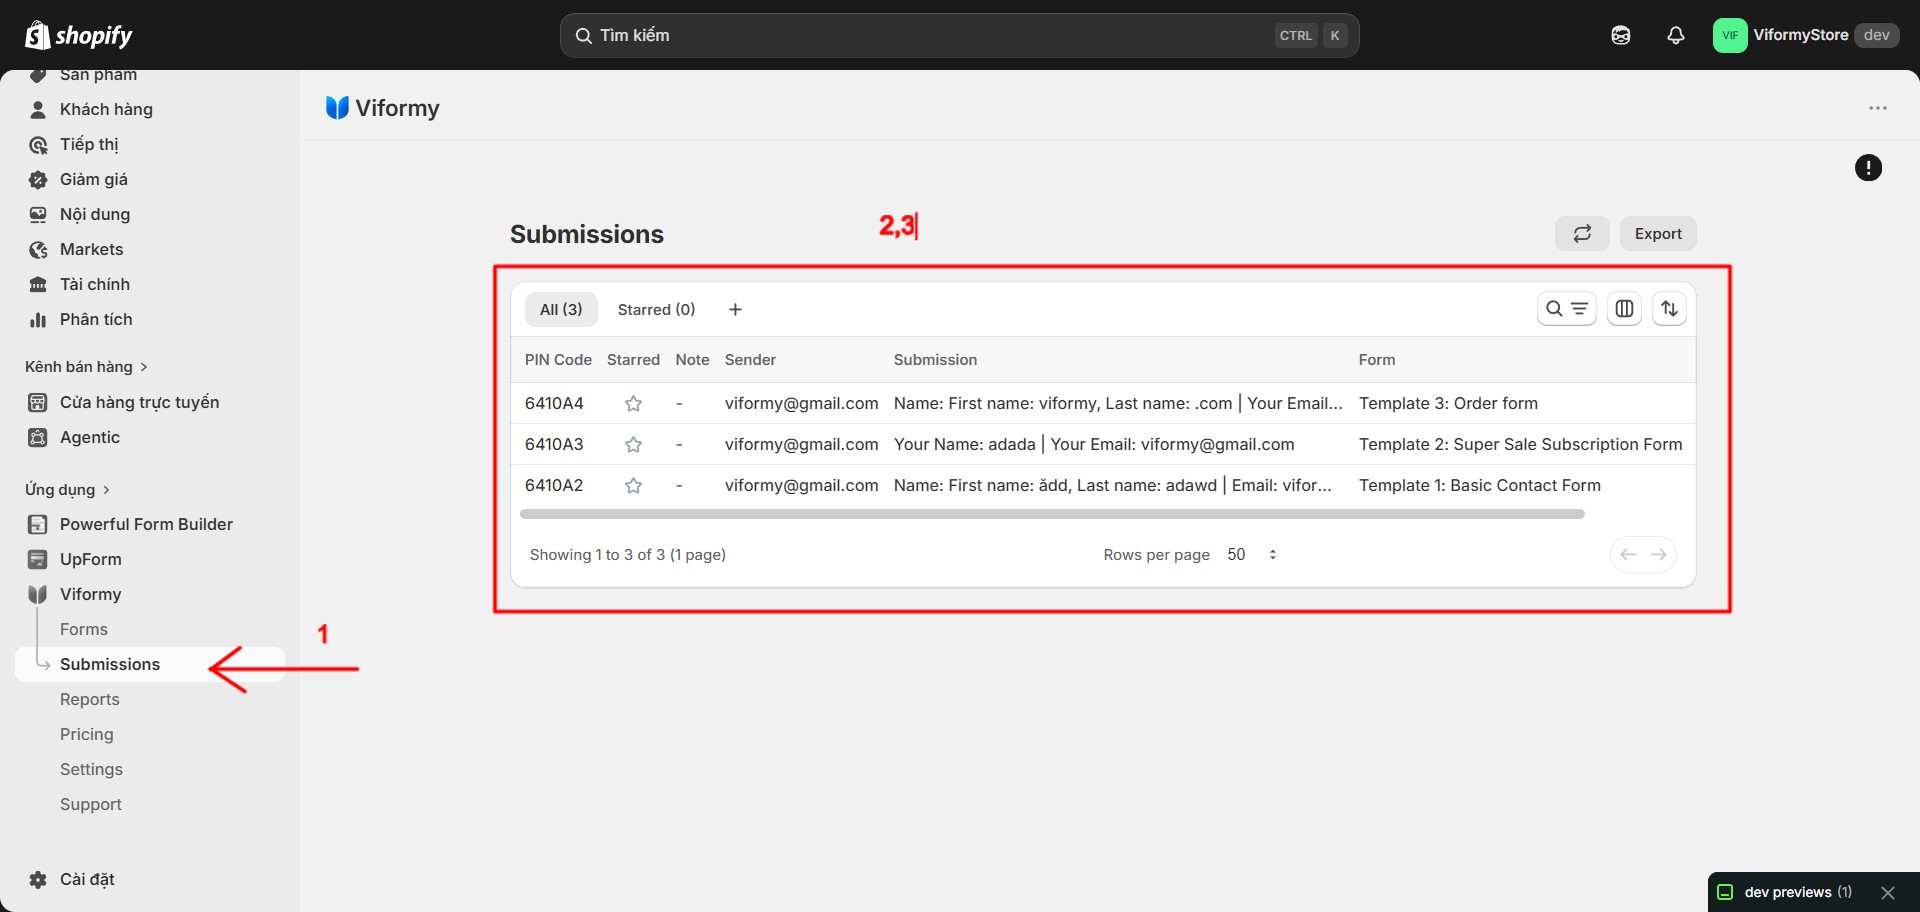
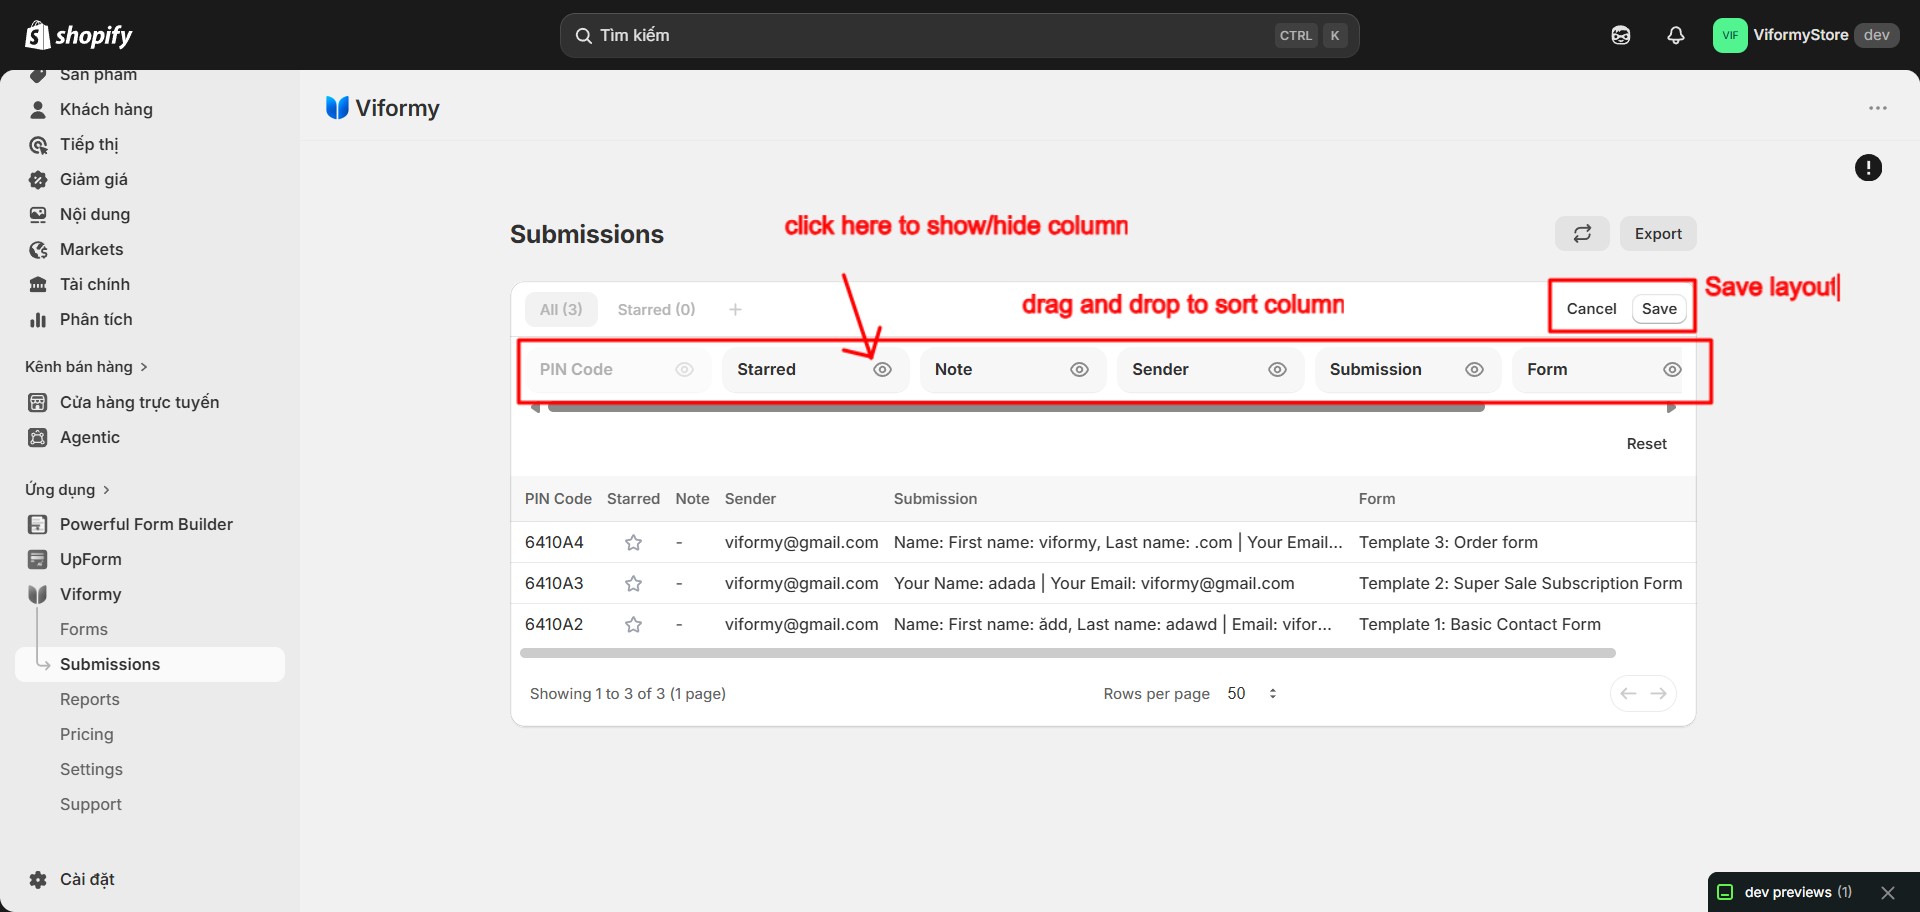
PIN Code: A short code generated for the submission.
-
Starred: Mark important submissions.
-
Note: Internal note added by your team.
-
Sender: Customer email or name detected from the submission.
-
Submission: A short preview of submitted field values.
-
Form: The form that received the submission.
-
Date: When the submission was received.
Step 2: Search Submission Data #
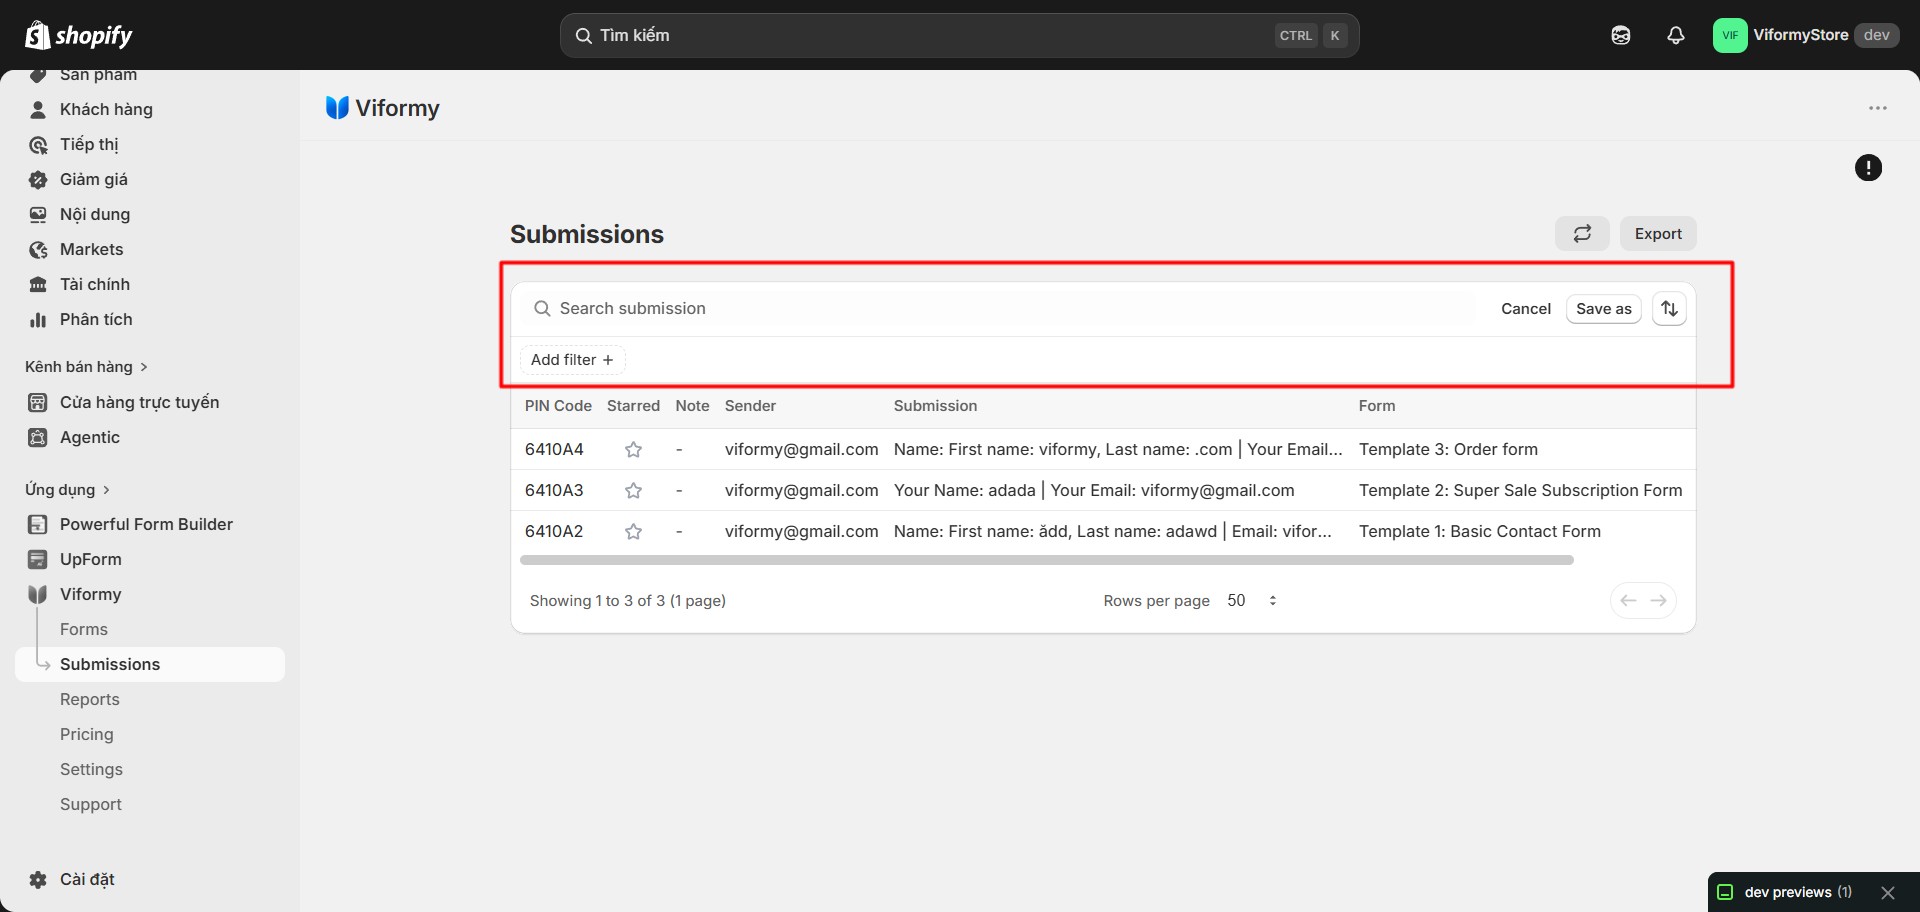
-
Submission ID
-
Sender email or name
-
Form title
-
Submitted field values
Step 3: Filter and Sort Submissions #
-
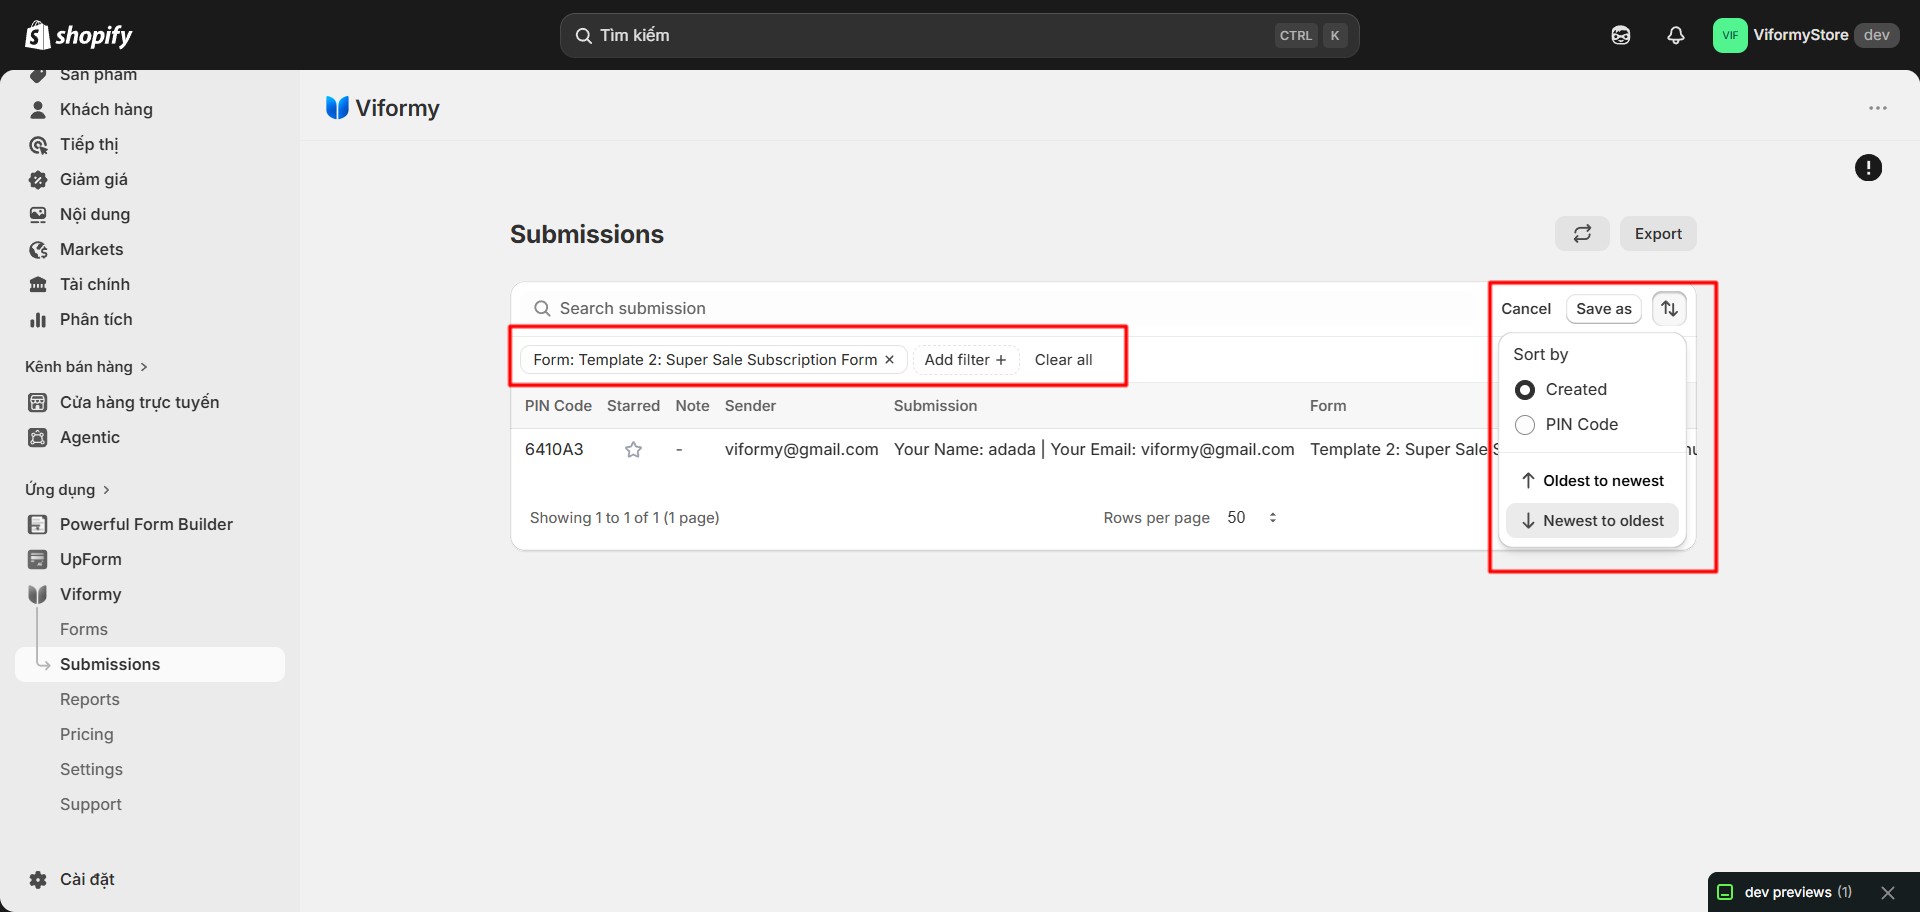
Starred: Show starred or unstarred submissions.
-
Form: Show submissions from selected forms.
-
Created: Filter by Today, Last 7 days, Last 30 days, Last 90 days, Last 12 months, or a custom date range.
-
Tags: Show submissions with selected tags.
-
Verified email: Show submissions with or without verified email status.
Step 4: Customize the Submission Table #
Step 5: Open a Submission Detail #
-
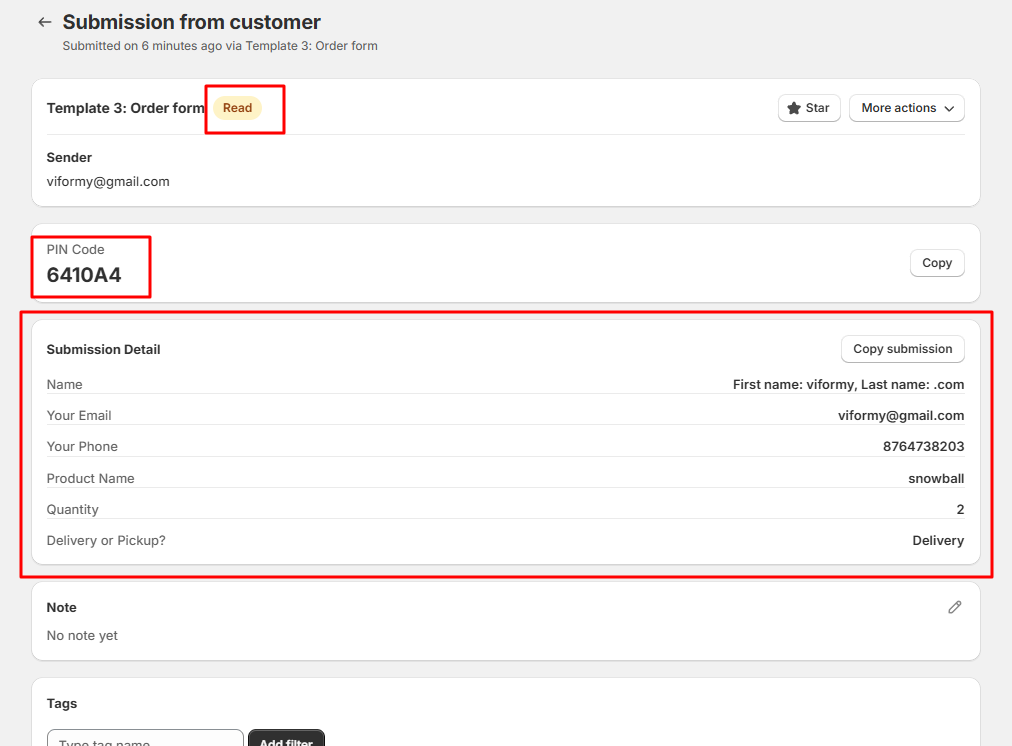
Form title
-
Submission status, such as Unread or Read
-
Sender
-
PIN Code
-
Submitted field values
-
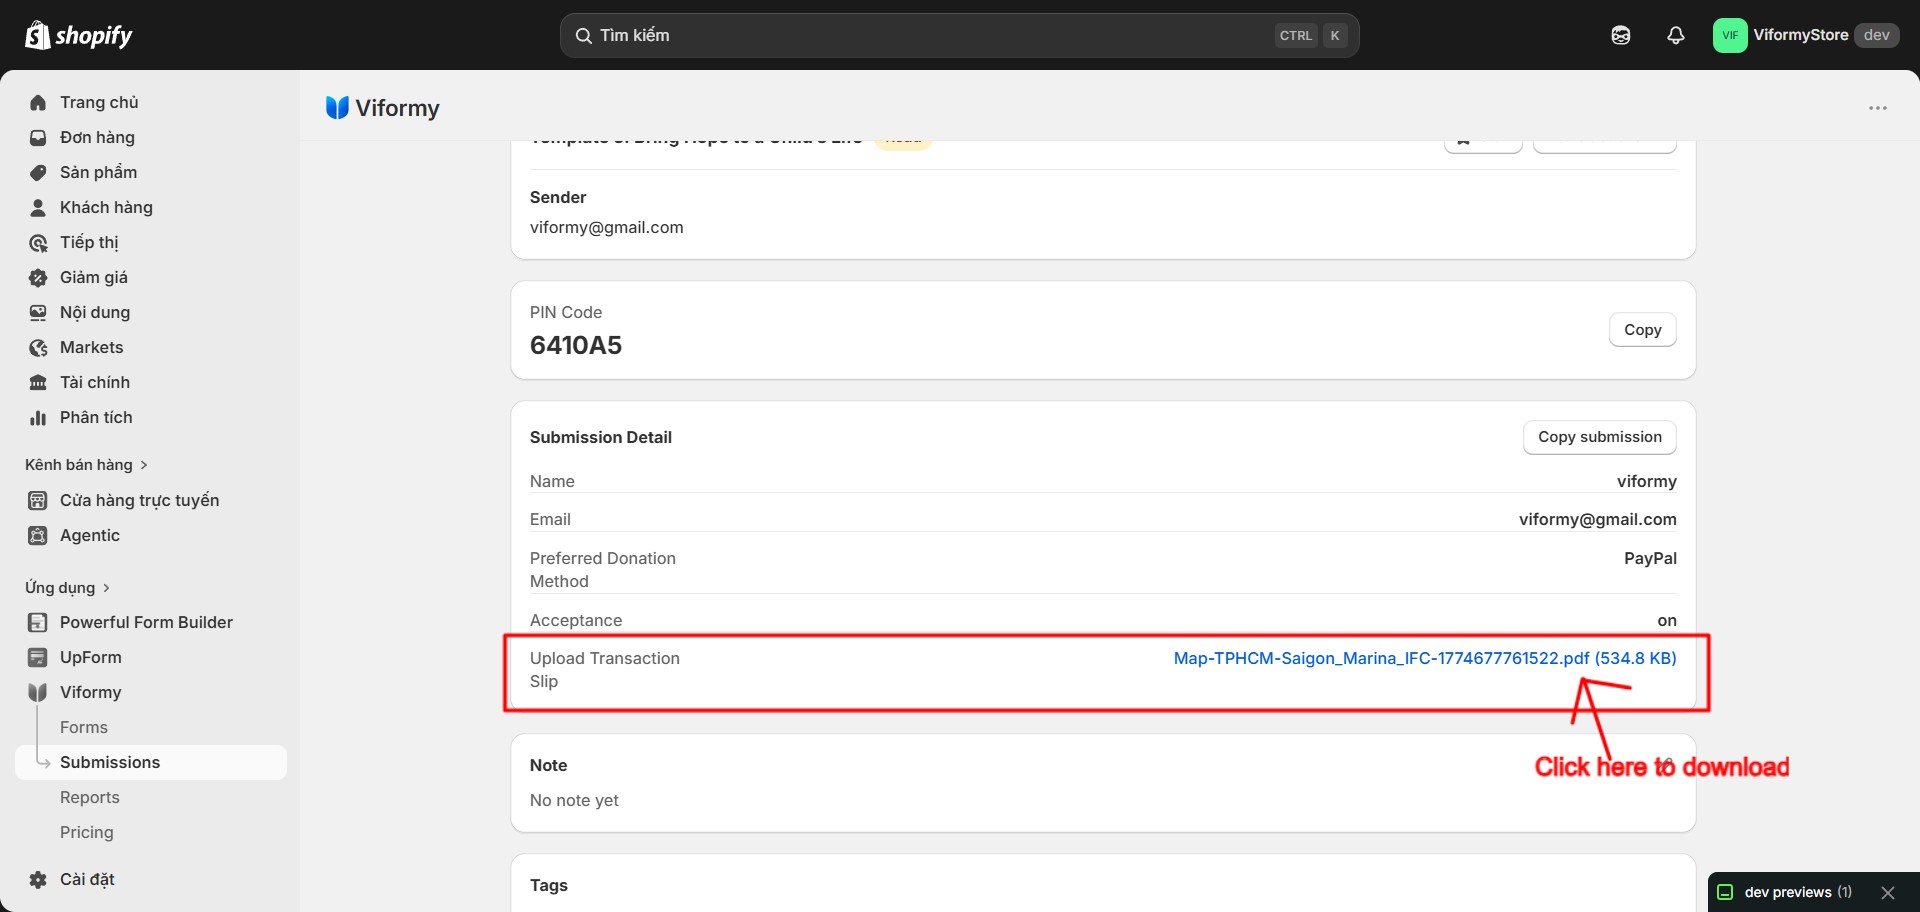
Uploaded files, if the form includes file upload fields
Step 6: Copy PIN Code or Submission Data #
-
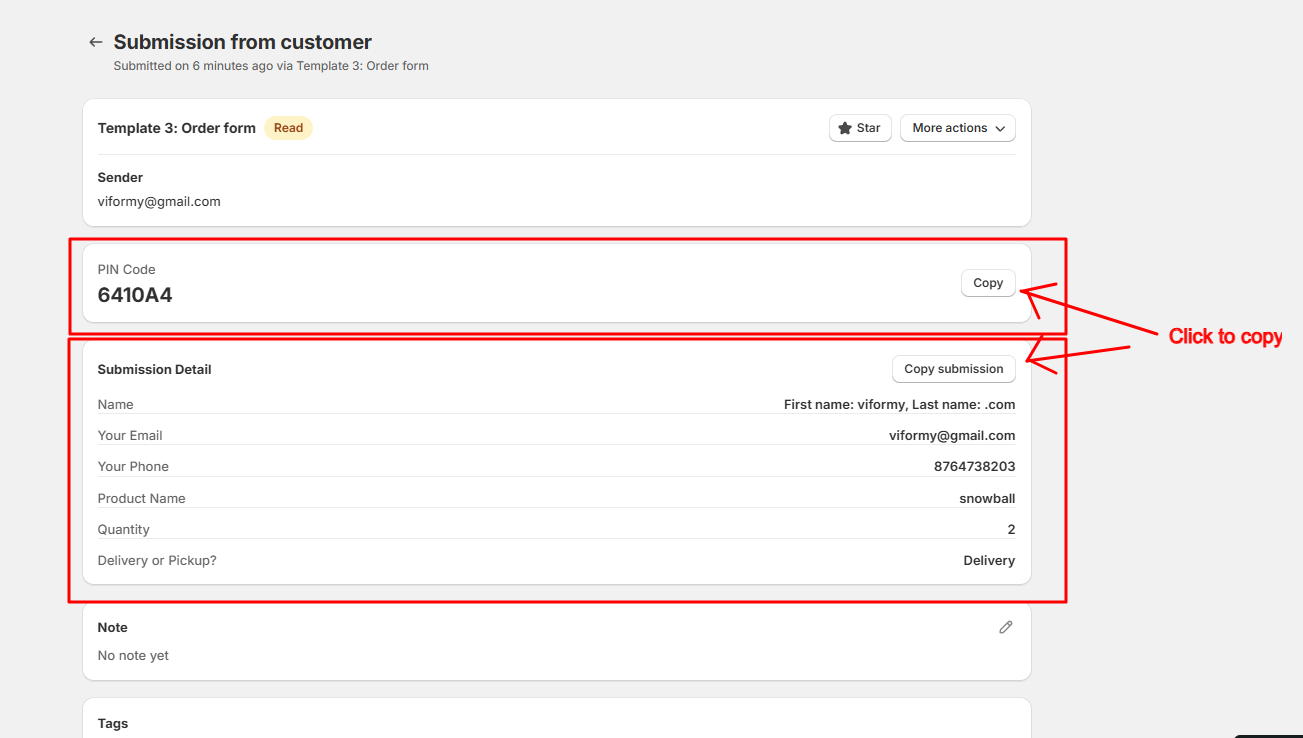
Copy PIN Code: Copies the short submission code.
-
Copy submission: Copies submitted field labels and values as text.
Step 7: Add Notes and Tags #
-
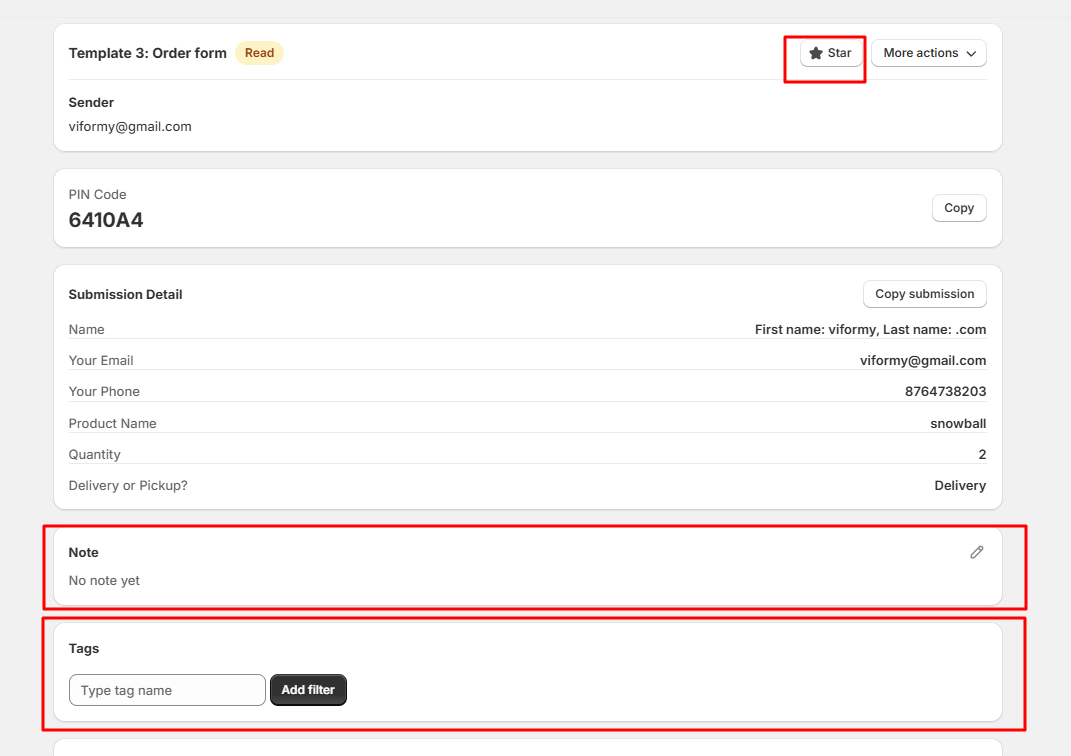
Note: Add an internal note for your team.
-
Tags: Add labels to group or filter submissions later.
-
Star: Mark important submissions for quick access.
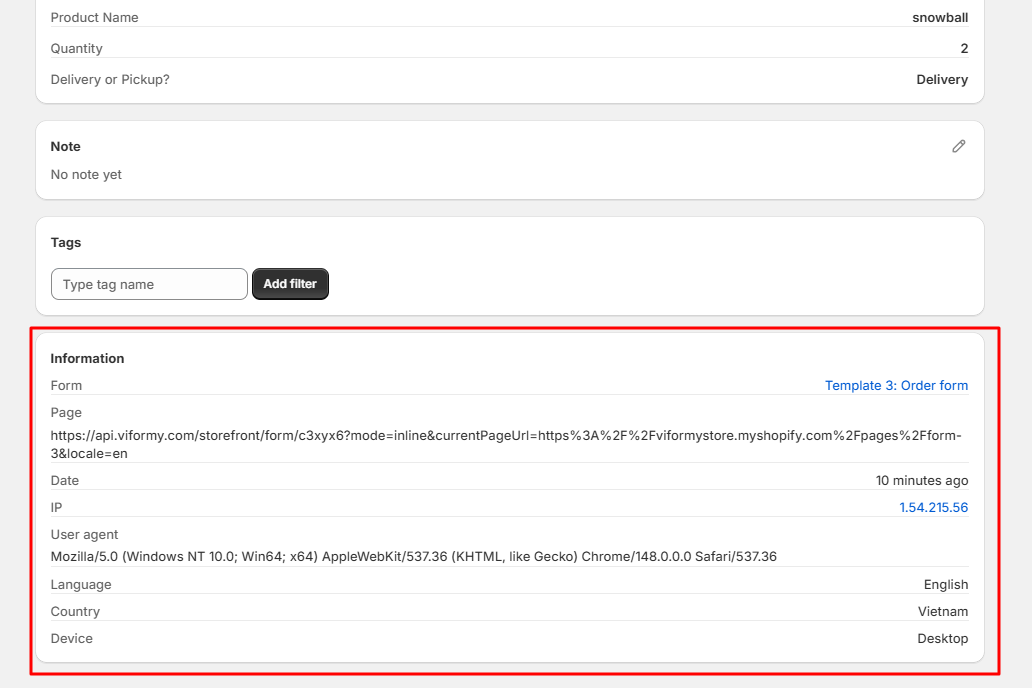
Step 8: Check Submission Information #
-
Form
-
Page
-
Date
-
IP address
-
User agent
-
Language
-
Country
-
Device
Step 9: Download Uploaded Files #
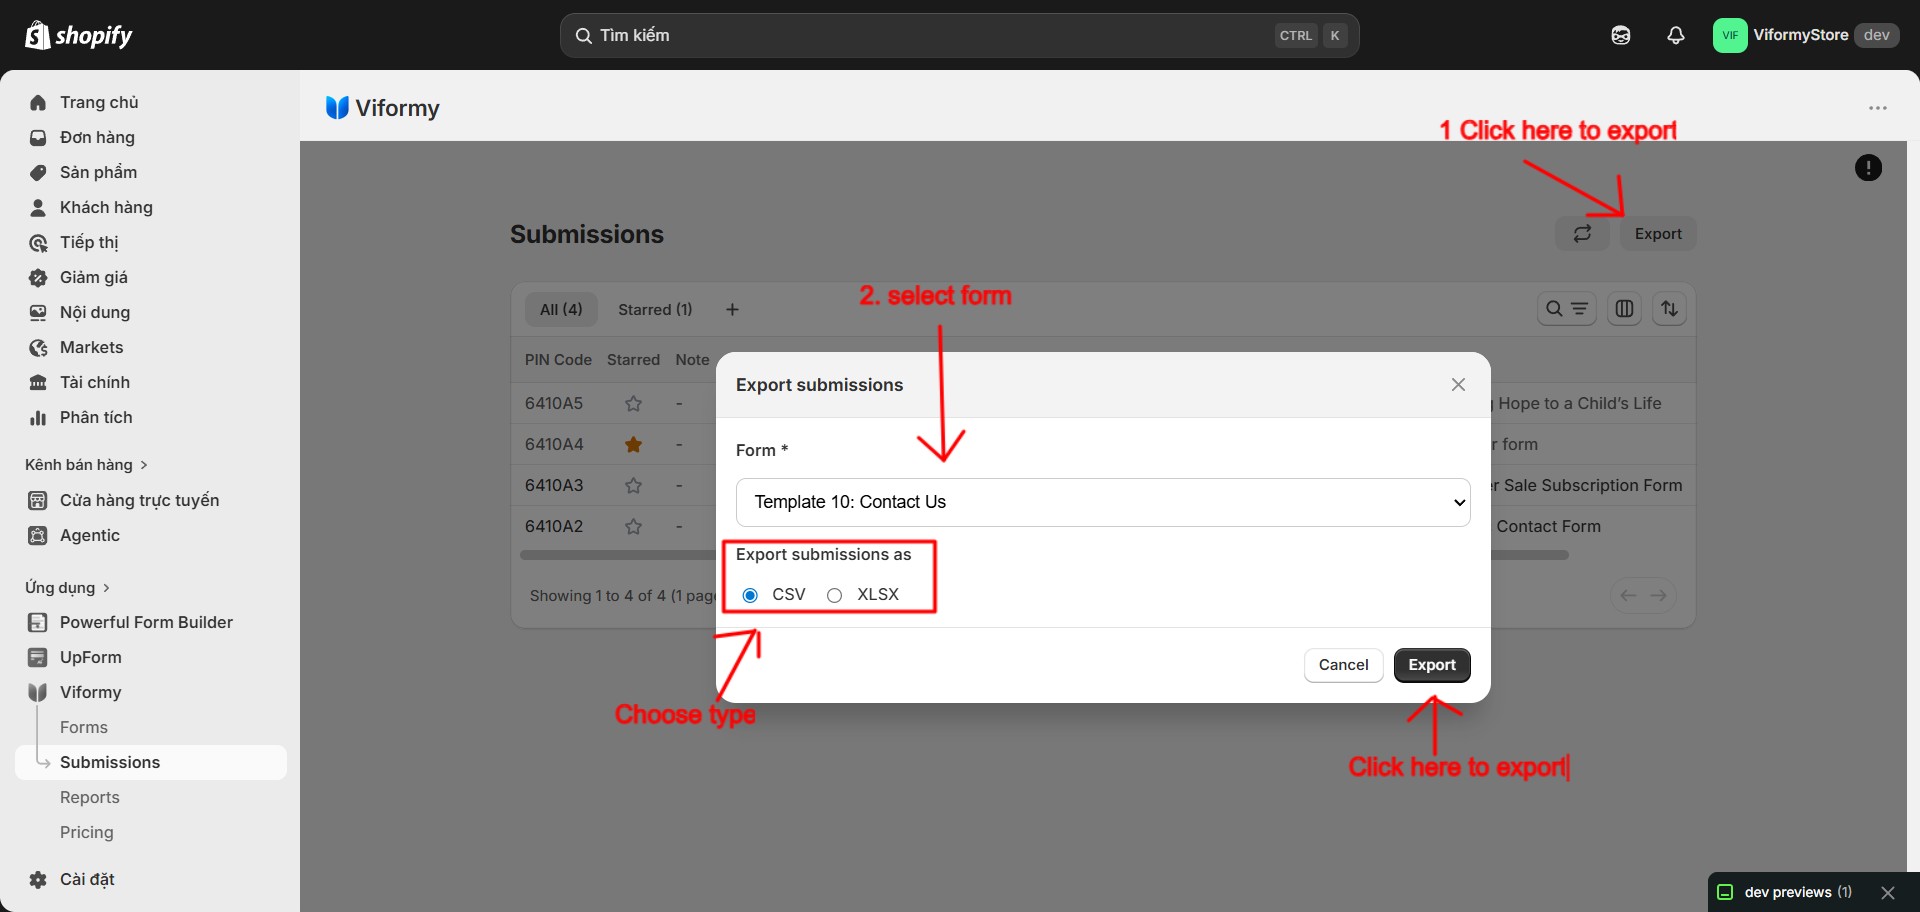
Step 10: Export Submissions #
-
CSV
-
Excel
Step 11: Delete a Submission #
Common Cases #
No submissions are shown
Search or filters show no results
Sender shows Unknown
Uploaded file is not visible
Quick Workflow #
-
Enable Save submission data in the form Settings tab.
-
Open Submissions in the Viformy app.
-
Search, filter, or sort the submission list.
-
Click a submission row to view full details.
-
Add notes, tags, or star important submissions.
-
Export submissions as CSV or Excel when needed.